

You can read about this in the osmosis special:
- Part 1: The development of osmosis
- Part 2: Recognising osmosis reliably
- Part 3: DIY osmosis remediation
- Part 4: Osmosis remediation from a professional
- Part 5: Professional osmosis prophylaxis
What are moisture meters good for osmosis detection?
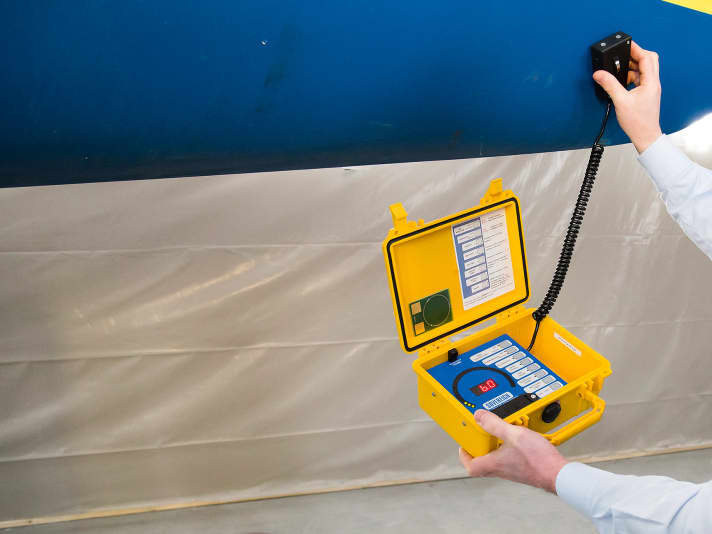
To dispel a prejudice right away: the much-vaunted moisture meters are not suitable for osmosis diagnosis. They can only be used to detect moisture present in the laminate. And even that is only possible relative to a presumably dry area, for example on the above-water hull. However, no one can tell from such a measurement, and this also applies to experts, how much moisture is in the laminate, only whether it is. Nor is it possible to determine whether it is laminate moisture or acid, without which there is no osmosis.
Moisture meters are therefore not a diagnostic tool, especially for laypersons. One could also maliciously claim that moisture measurements for osmosis diagnosis are charlatanry.

A moisture meter is only really helpful during refurbishment. A capacitive instrument can be used to monitor the drying process of the exposed laminate. Cheap wood moisture meters with test probes are unsuitable. They only provide values for the surface of the material; moisture in the laminate cannot be detected.
Detecting bubbles in the gelcoat
The aim of an osmosis test is to examine the gelcoat for blistering. But this can be difficult. Because you have to see the gelcoat first.
In older yachts, the gelcoat blisters are often covered by a thick layer of antifouling, which in turn is uneven and conceals the osmosis blisters on the surface. To make matters worse, the hull also dries out on land, causing the blisters to shrink. If a yacht is left ashore for several weeks or months, there may be no signs of osmosis damage, or rather hydrolysis damage, even though the decay inside the laminate may be well advanced. The tricky thing is that the process continues unabated the next time it comes into contact with water.
The assessment of a boat in terms of osmosis should therefore take place directly after it has been uncraned. Freshly lifted out of the water, any unevenness on the underwater hull is easy to spot.
Find bubbles with these methods


Grazing light
Immediately after uncraning, inspect the still wet underwater hull against the light. As the light runs parallel to the hull like grazing light when viewed from the correct angle, shadows will form in the areas where the hull bulges outwards. Bubbles will become visible.
However, a grazing light can also be created indoors with a powerful torch held flat against the fuselage. Each elevation casts a shadow and bubbles are easy to recognise.
Grinding test
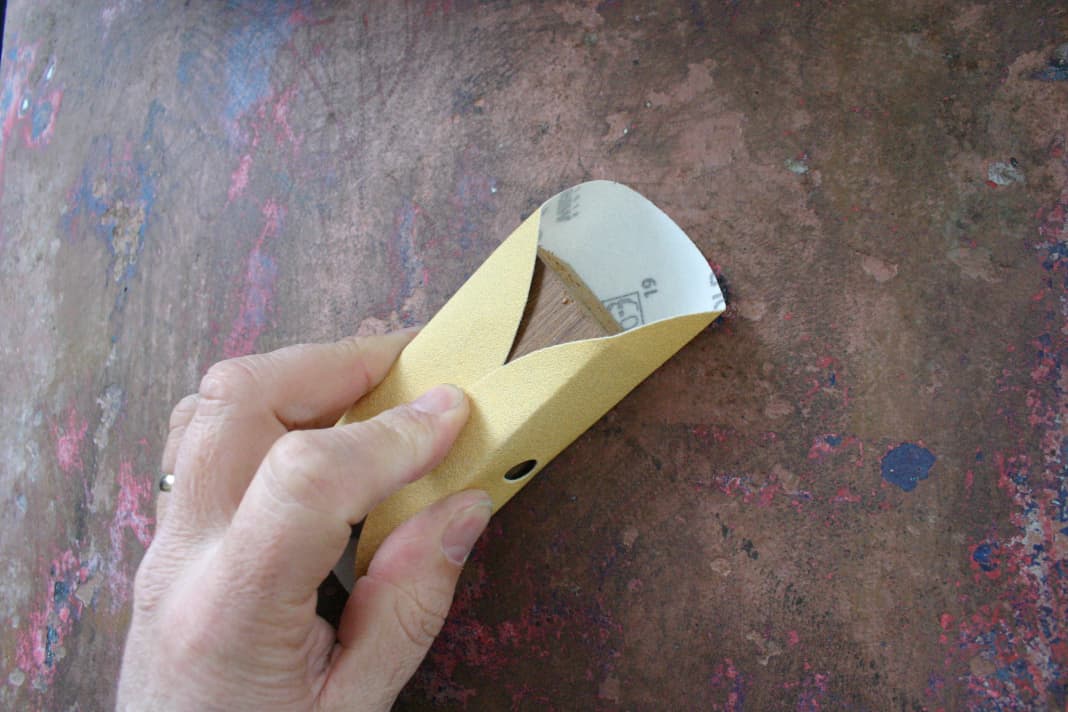
This involves using P120 sandpaper to sand a surface approximately A4 in size flat up to the gelcoat. Existing bubbles, which are raised areas, are first exposed (beheaded) and appear as dots on the surface. This also makes it clear whether the bubble has arisen in the colour structure or whether the gelcoat is affected. The individual layers of the old paint can also be recognised at the edges of the sanding area.
Wipe test
Use a solvent such as acetone to dissolve and wipe off the underwater hull coating. Single-component primers can also be easily dissolved. If the entire underwater hull coating can be wiped off down to the gelcoat, there is no additional osmosis protection on the gelcoat and the boat has never been specially treated in this respect. If the primer cannot be removed, it is most likely an epoxy primer that has already been applied as an osmosis layer.
UV light
The laminate decomposition (osmosis) cannot be recognised from the outside until the blistering stage. To check whether acid has already formed in the laminate, the gelcoat is first sanded clean, see sanding test. The area to be tested is illuminated with a UV light test lamp, which makes the acid effect on the gelcoat on the laminate side visible as dark spots. These discolourations cannot be seen under natural light (daylight sources), so that the gelcoat appears completely intact without UV illumination. This method can be used to detect osmosis esters - which cannot (yet) be localised by blistering. This method is therefore regarded as early osmosis detection.
Beam sample
This can only be done by a professional using sandblasting. You can read how this test is carried out in this article:
Do bubbles necessarily mean osmosis?
If such bubbles are discovered, the next step is to investigate the cause, as they do not necessarily have to be osmosis bubbles. There may also be a problem in the coating structure. Either individual layers of the antifouling have separated from each other and "bloomed", or the entire coating system has separated from the gelcoat, for example if an incorrect, inadequate or no primer (adhesion promoter) has been used.
But: Only a detachment of the gelcoat in the form of bubbles from the laminate or a detachment between the laminate layers indicates osmosis.
When is osmosis involved?
The simplest form of testing is to pierce the bladder with a pointed, half-round carpet knife and carefully open up the bladder wall. Alternatively, the corner of a chisel can also be used. The back of the bladder wall will then always be the layer that peels off.
This is how the result should be interpreted:
- If aFurther colour layer If the colour is recognisable, it is the detachment of two layers of paint from each other.No osmosis.
- Will the smooth,intact gelcoat is visible, it is a detachment of the colour coating from the gelcoat.No osmosis.
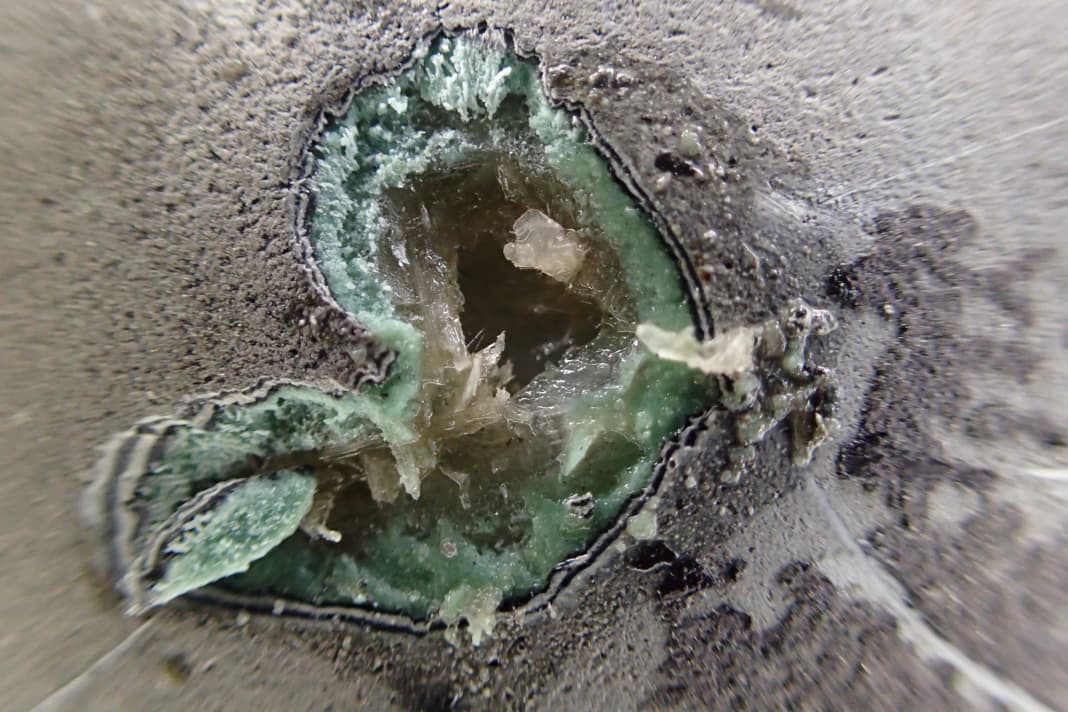
- Will theLaminate visible and an acid that smells of vinegar is released (but not necessarily!).Osmosis!
It is somewhat rougher to prick directly into the blister with the chisel corner. If the tool clearly penetrates the hull with a soft cracking sound, the laminate becomes visible and a smelly liquid comes out, it is an osmosis bladder.


If osmosis is found, it may be necessary to refurbish the entire underwater hull, either using the DIY method or having a professional do it.
You can read about this in the osmosis special:
- Part 1: The development of osmosis
- Part 2: Recognising osmosis reliably
- Part 3: DIY osmosis remediation
- Part 4: Osmosis remediation from a professional
- Part 5: Professional osmosis prophylaxis

