Lifehacks: The 10 best reader tips for the mast in winter storage
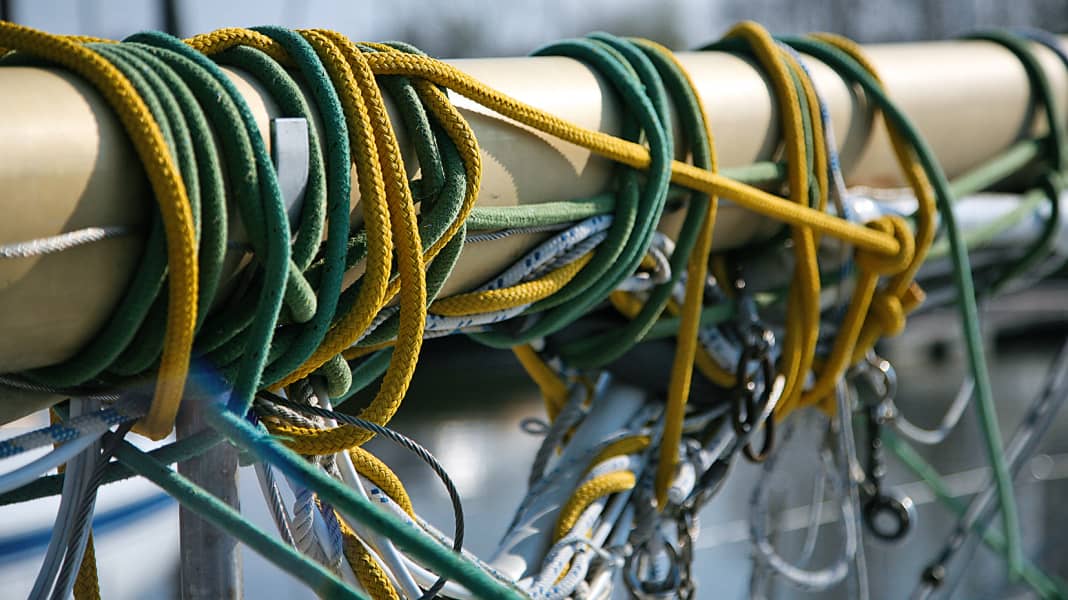
Mast-Lifehack 1:Carefree in winter storage- the rain gutter in the rigging
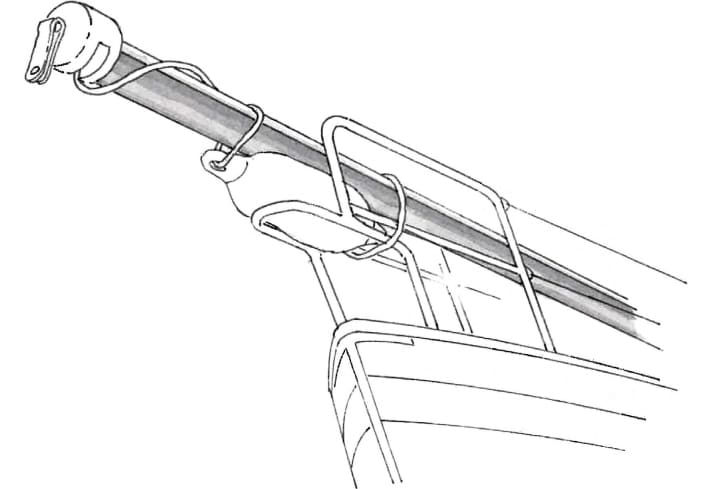
On rigs with the mast standing on deck, the forestay protrudes beyond the mast profile in length. This can be problematic during winter storage if the forestay sags due to the weight of the furling system and the forestay profile is bent as a result. We store our rig horizontally on deck in winter and have simply solved the problem described with a piece of rain gutter that serves as a rail, so to speak. The gutter happens to fit the profile of the mast quite well. We placed it under the mast and let it protrude far enough at the front to reach the furling system. This allows the forestay profile to rest on the channel and there is no risk of it bending. If the mast profile is significantly larger, a PVC pipe cut lengthways can fulfil the same purpose.
Claas Brouer, Kiel

Mast-Lifehack 2:Protection for the paintwork when laying masts
Maintaining the wooden superstructures on my boat is a lot of work. This makes scratches and cracks that could have been avoided all the more annoying. That's why I bundle the shrouds and stays directly into a jute bag when I lay the mast. That way they are neatly stowed away and don't cause any more damage. I do the same with the halyards. Jute sacks are usually available free of charge at the Christmas market at the stalls selling roasted almonds.
Hellmut Koch, Brunswick

Mast-Lifehack 3:Third hand for mast cranes
Every year, owners struggle with stubborn forestays at the end of which the heavy furling drum takes on an unwanted life of its own. For this reason, we have built a bracket that is attached to the profile before the mast is laid. This bracket consists of two half shells cut out of a 30 millimetre thick plywood panel. I drilled a hole at the top and bottom so that the two halves can be easily reassembled using carriage bolts and wing nuts. If the mast is now tilted, the furling system lies securely in a suitable recess.
Peter Axen, Lübeck-Travemünde

Mast-Lifehack 4:Rain protection for masts
The problem with overhauling wooden masts in the open air is the weather: with at least eight coats of paint on fresh wood, this is a problem because water destroys the new paint structure. As we didn't have a hall available, we made a shelter out of an old pavilion. The right-angled side sections serve as a roof frame and were connected with cable ties, while the cross struts of the pavilion become supports. A DIY store PVC film, simply attached with tape, serves as the roof. One pavilion makes eight metres of tent.
Anni Brucks, by e-mail
Mast-Lifehack 5: This keeps the sail clean during the launch
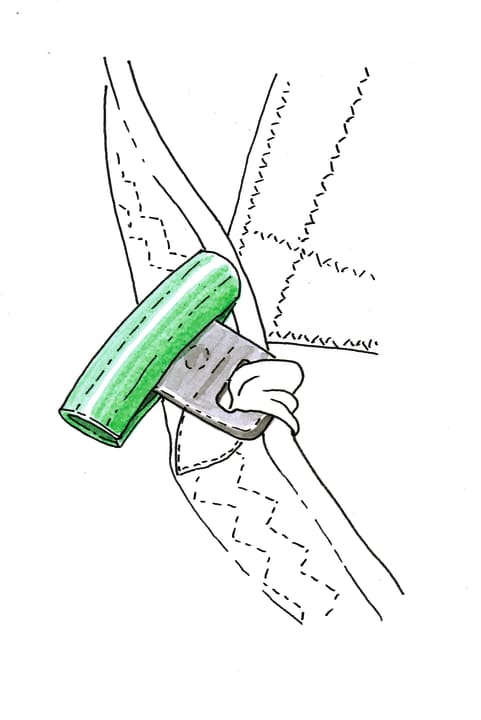
If the mainsail has to be taken down for repairs or at the end of the season, the mast slides can cause ugly stains on the white cloth. The aluminium abrasion and other dirt from the mast groove collects on the plastic parts; if these then come into contact with the sail, it happens quickly. Such stains are very difficult to remove. The easiest way to avoid such stains is to minimise contact between the sliders and the cloth. We have found an effective way to do this: We cut an old water hose into five-centimetre-long pieces and slit them lengthways. The sections are placed on the slides when the sail is lowered. This way, no contamination can occur during the hoisting and subsequent transport of the sail. When the cloth is attached, the hose sections are removed one after the other and stored in the toolbox for the next use.
Falko Mattner, Oberkrämer
Mast-Lifehack 6: Balanced on the crane
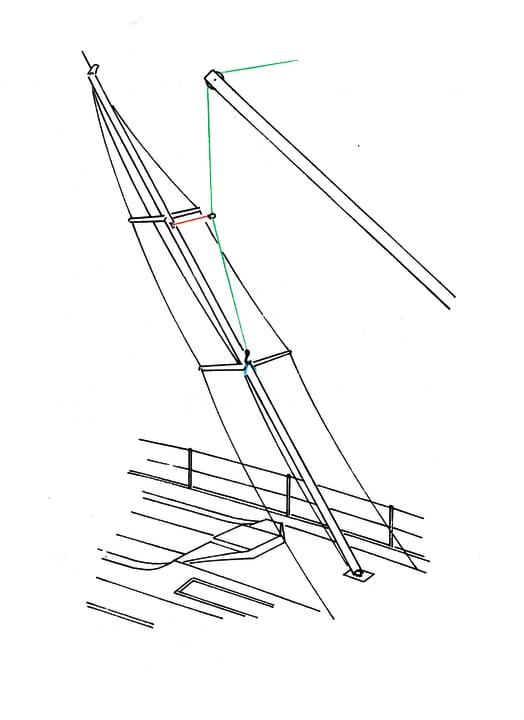
If, like us, you own a two-saling rig, you will face the problem of positioning and setting the mast at the correct height, as the centre of gravity of the rig is between the spreaders. We proceed as follows: The crane hook itself is attached in a loop below the first spreader. A large shackle is now placed on the crane rope, attached to the toppnant and the length of the catcher is adjusted so that the resulting point of attack of the crane is above the rig's centre of gravity.
Günter Zachritz, Kiel
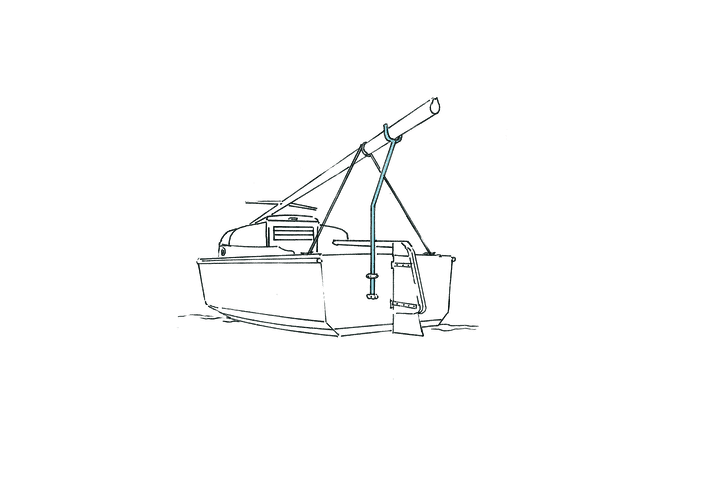
Mast-Lifehack 7: Support and control
As with many other dinghy cruisers, the mast support, which holds the laid mast aft, is hooked into the fittings of the steering gear. This dual use of the rudder fittings is actually very clever, unless it is necessary to sail a section with the mast laid down, be it from the slip ramp under the mast crane or on a crossing trip with low bridges. That's why we thought about and made a new mast support. The main idea was that the support is cranked and can therefore be mounted off-centre. To do this, we bent a VA tube slightly. As the mast is relatively light, 30 x 2 millimetres or even just 25 x 2 millimetres is sufficient. We welded a U-shaped support to the top. The new support is held to the mirror by two flange plates. The parts measure 80 x 25 x 3 millimetres and are fastened with M8 screws. The rudder system now remains mounted, which makes slipping easier.
Rüdiger Marwede, Neustadt
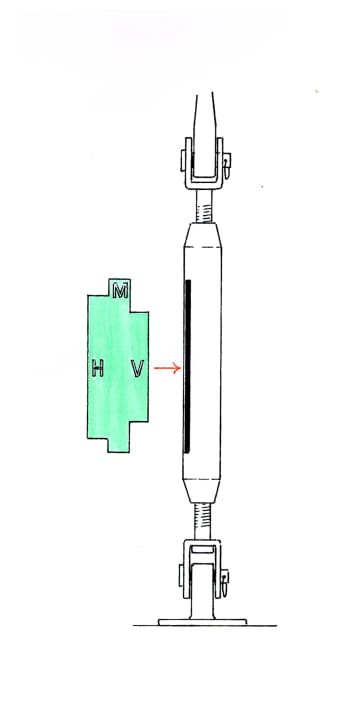
Mast-Lifehack 8: Reproduce rig trim
To avoid having to measure the uniform length of our upper and lower shrouds with a folding rule, tape measure or calliper every time I set the mast, I made myself a metal template that I simply stick inside the shroud tensioners to check the measurements. I took the measurements last year after the mast was 100 per cent standing. The template can also be made from aluminium, plastic or even hardwood.
Ludger Arens, Ennigerloh

Mast-Lifehack 9: Flexible shrouds for mast laying
Anyone who can raise and lower the mast themselves thanks to the folding foot will know that by fitting special rigging irons, the point of attack of the main shrouds on the foot side can be brought into alignment with the centre of rotation of the mast. In this way, the mast does not sway back and forth during the laying or positioning process. This procedure makes sense, but is also associated with costs. A conversion is not absolutely necessary - the problem can also be solved with a set of auxiliary shrouds. And it's cheaper and easier than making higher pütting irons - which don't look very nice either. I use a double rope on board. This is attached to a mast slide and pulled over the spreader in the mast groove with the main halyard. The ends of the two lines of equal length are attached to the right and left of the main shrouds. During the setting or laying process, the main halyard is now held taut by a second person. Under no circumstances should the halyard be covered! These auxiliary shrouds hold the mast effectively and securely in line with the centreline, even while sailing and in swell.
Horst Wilk, Emden
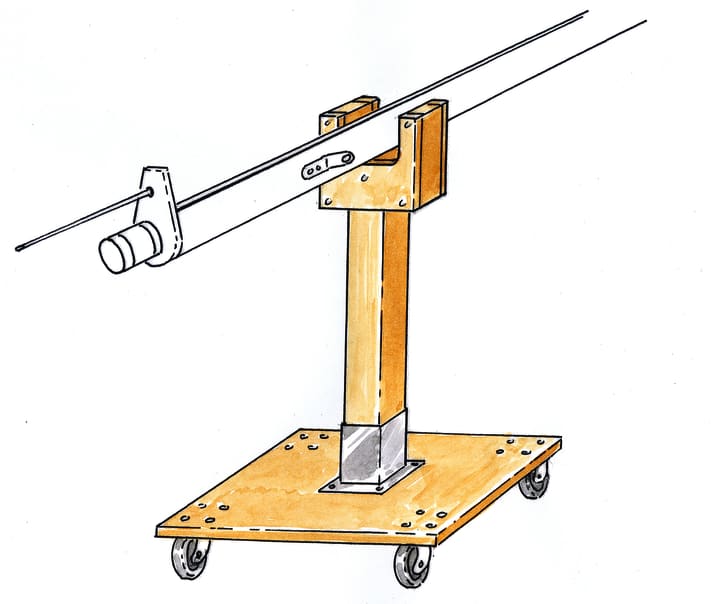
Mast-Lifehack 10: Roller skates for the palm tree
Instead of supporting the mast on two wobbly trestles when craning, I made two mobile mast trolleys. I fitted a 60 x 60 centimetre plate with swivel castors, two with brakes on each. The one metre long squared timber stands in a screw-on sleeve, and I cut the fork out of plywood. The total material costs for both mast trolleys came to 145 euros. All parts are available from DIY stores. The castors make it easy to move the mast.
Wolfgang Lehrum, by e-mail
Do you have any advice for other sailors?
We will honour the publication of your lifehack with50 EURO.Please add photos or sketches. We also need your address and bank details
Submissions to: Editorial office YACHT, Quartier O, Paul-Dessau-Straße 8, 22761 Hamburg; or: mail@yacht.de

