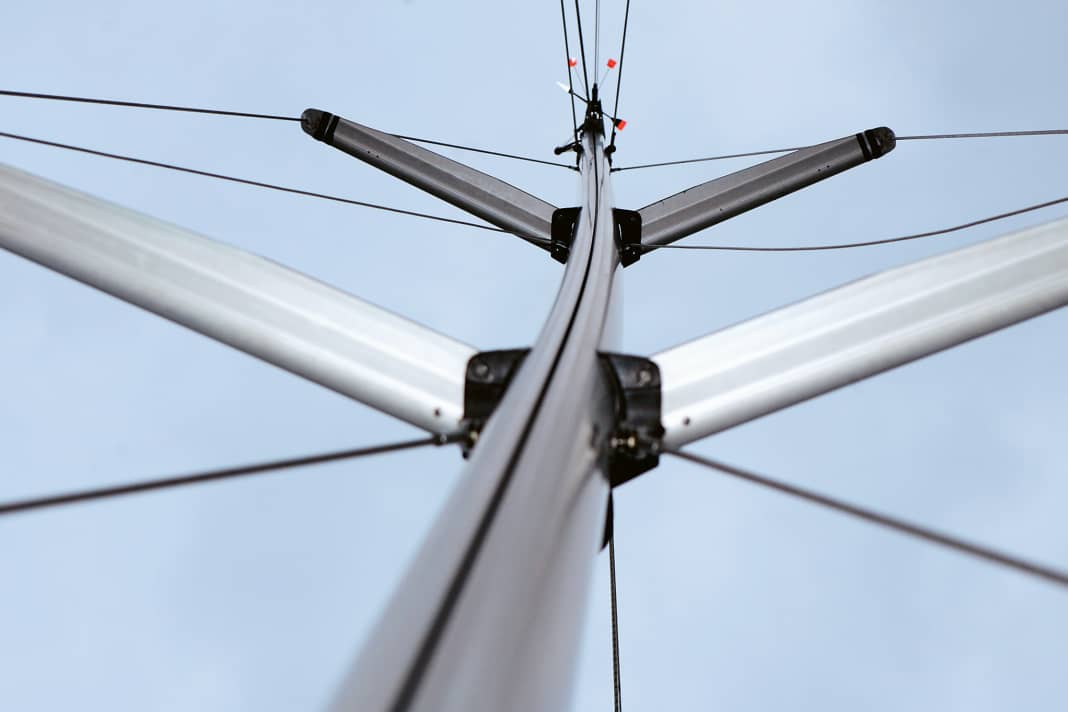


The mast, stays and sails interact in the rigging system. The behaviour of the mast is influenced by the setting of the shrouds and stays as well as by the sail area set and its distribution. At the same time, the trim of the mast determines how the sails are positioned and what propulsion they generate.
Rig trim for more sailing performance
Correct rig trim is therefore a basic requirement for optimum sailing performance. With a few exceptions, the aim is to apply tension to the forestay so that the luff of the genoa does not sag too much on upwind courses, which is almost always accompanied by a loss of height. At the same time, the mast bend also influences the mainsail. A mast that bends forwards in the centre pulls the mainsail flatter in the middle, which reduces pressure as the wind increases and pushes out the reefing point. Similarly, a masthead that bends aft and to leeward can take pressure off the mainsail as the leech opens.
Rig trim for more safety
Correct rigging trim is also an important safety aspect. Basically, the shrouds and stays are only there to prevent the mast from falling over. This can be achieved under static conditions, such as in a harbour without sails set, with very little tension on the wires. Apparently, this also tempts many owners to leave their rig exactly as it is - with too little pre-tension. So when you walk through the harbours and look at various rigs, you can only marvel at the fact that some of them are still standing. Shrouds that are too loose, masts that are bent forwards or even negatively bent, i.e. with a bend towards the stern, can be seen again and again. The cause is often ignorance. This article is intended to remedy this.
High shroud tension is important
A widespread misconception is that permanently strongly tensioned shrouds put too much strain on the yacht's structure. This is basically true. A yacht does change its shape slightly over the season due to rig tension, but this should have been factored into the design and taken into account during construction. Wooden boats in particular can give way to the tension of the wires. However, this does not mean that it is better to do without this tension, but rather to check the basic trim more often during the season and retrim if necessary. In the winter season, the yacht should then return to its original shape with less strain.
However, a rig that is too loose is much more dangerous than a possible slight deformation of the hull. In stronger winds, but above all in higher, rougher seas, the mast can start to pump if it is insufficiently pre-tensioned, leading to much higher load peaks in the fittings than would be the case with a sufficiently pre-tensioned rig. This can cause terminals, toggles or bolts to break, resulting in a broken mast.
Incorrect rig trim often goes hand in hand with changes in the crew's sailing habits. Whereas in the past, for example, a top-rigged yacht was sailed in a more sporty manner, i.e. with a genoa and mainsail even in stronger winds, today the same crew - older, perhaps physically weaker and with less ambition - only sails with a genoa. But then, with the same rig trim, the counter-pull from the mainsail is missing, the masthead can bend forwards, the centre of the mast can bend aft, the support of the bracing is lost and the mast collapses.
Worth knowing in advance
Gerhard Paasch, former managing director of the wholesaler Gotthardt, which also sells the masts of the Swedish manufacturer Seldén, has written a trimming guide for all common rigs, which is still considered the standard among sailmakers and trimmers today.
The specifications for the correct rig pre-tensioning in the following instructions for the most important rig types refer to the values recommended by Paasch. These instructions not only guarantee a safe setting for most rigs, but also one that enables good sailing performance.
However, as a rig is a complicated system in combination with the sails, it is always a good idea to ask your local sailmaker, other owners of the same type of boat or the class association about their experience.
Incidentally, the information on when the wires of a rig should be replaced varies. Insurers speak of 10 years, Gerhard Paasch recommends after 15 years or 25,000 nautical miles. Although the wire lasts, even if it is older, it loses its elasticity over the years and thus transfers the full load from gusts or a hard entry into a wave to the fittings. This means large load peaks with possibly unpleasant consequences. Against this, the costs for new wires are low.
Basic settings for each rig
The main factors in rig trim are the mast drop and the lateral and forward mast bend. A correct initial trim is the basis for all further measures
Mast drop
A slight aft tilt of the mast stabilises the overall rig system and has an effect on the sailing characteristics. The more the mast is tilted, the more windward the boat will be. A mast drop of 1 to 3 degrees is considered sufficient for cruising.
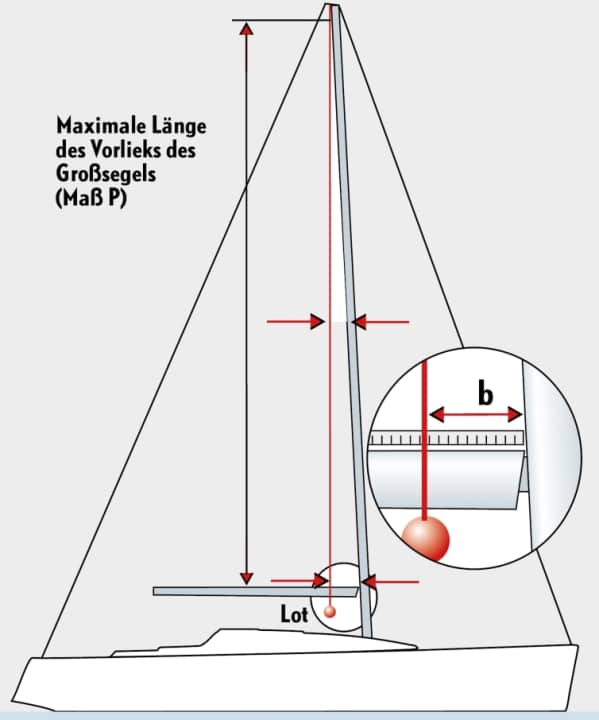
This is how the mast drop is measured: If the length of the mainsail luff (dimension P) is not known, pull a tape measure into the top of the mast and measure it. Tighten all shrouds and stays only "lukewarm", trim the boat as straight as possible lengthways and crossways. Attach a weight to the halyard. To prevent it from swinging too much, you can hang it in a bucket of water on the cabin roof. Now measure the distance from the halyard to the trailing edge of the mast.
Determining the mast drop is just an exercise in trigonometry. But there is another way. The P measurement in metres multiplied by 1.75 gives the distance on the boom in centimetres, times 3.49 for 2 degrees, times 5.23 for 3 degrees. With a luff length of 8 metres, the distance for a mast drop of 1 degree should therefore be 14 centimetres.
Mast tilt
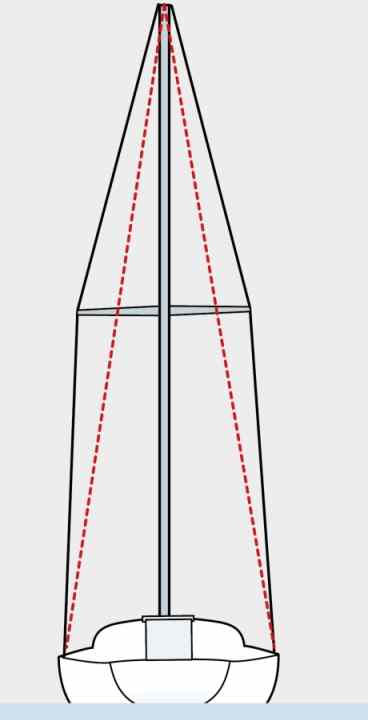
Before trimming, the mast should first be levelled in the boat. To do this, only loosely tighten the shrouds and stays and measure the distance from the top of the mast to the jib irons using a tape measure. If the measurements are different, loosen and tighten the shroud tensioners accordingly. If no measuring tape is available, the main halyard can also be used as a reference. Pull it up to one of the jib irons, place it in the lever clamp and check that the distance is the same on the other side.
Mast bending
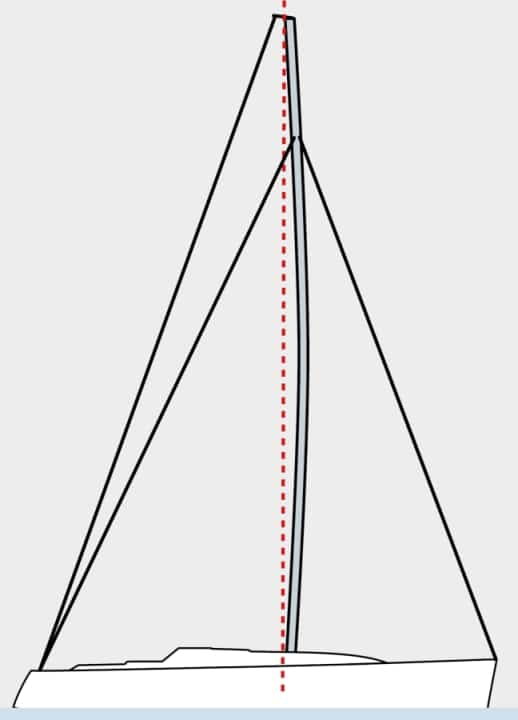
In order to be able to better estimate the deflection of the mast when trimming, pull the main halyard up to the mast foot or boom clew, attach it there and tension it slightly. It now serves as a chord between the foot and top of the mast and the bend can be easily recognised. Under sail, you can also use a halyard instead of a dirk.
Trimming instructions for rigs with 90-degree spreaders
This is an older rig, often with a large genoa and small mainsail. The mast bend in the longitudinal direction is influenced by the backstay, sometimes the backstays and the lower shrouds.
Variants for such rigs
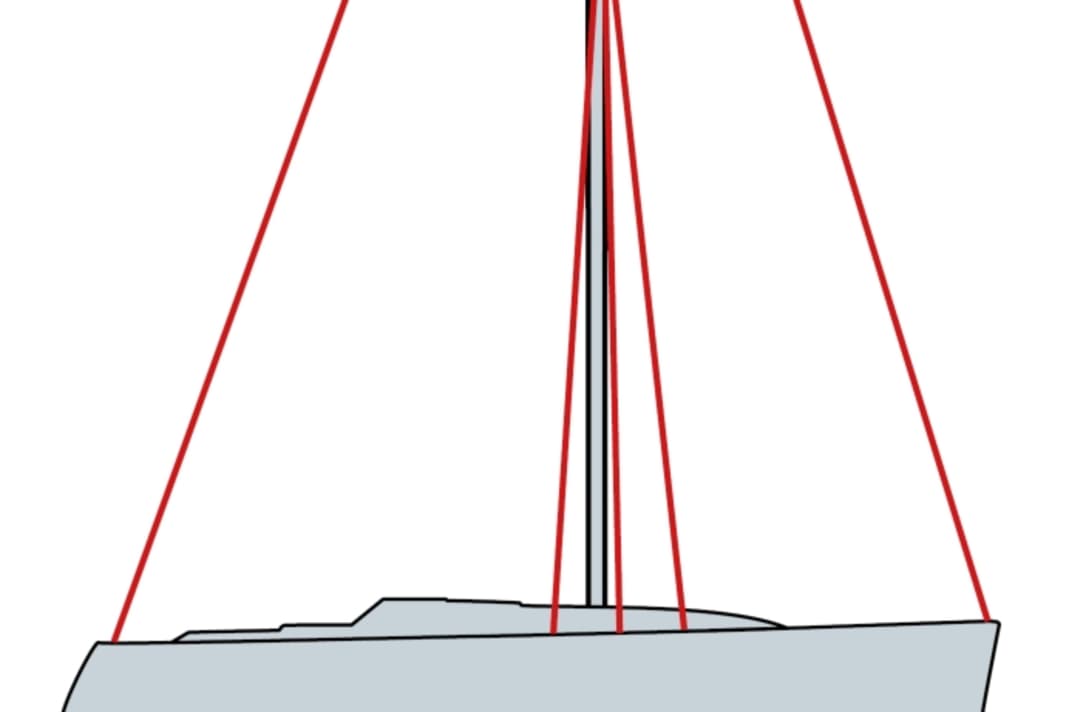


Rigs with neutral spreaders, i.e. which stand straight out to the side of the mast without sweeps, are best trimmed; the upper shrouds only take over the lateral bracing of the mast. The fore-and-aft trim is achieved primarily by the backstay, the aft and forward lower shrouds, sometimes also designed as a baby stay, as well as the backstays. These are increasingly used on partial rigs where the forestay is not attached to the top of the mast but slightly below it. Depending on how large this distance is, they are referred to as 7/8 rigs, 9/10 rigs or 19/20 rigs, although these are usually not exact length specifications.
The main difference between top and partial rigging is that with the latter, the backstay has significantly more influence on the mast bend in the longitudinal direction. The distance to the forestay attachment point creates a lever, which simultaneously tensions the forestay and bends the mast when the backstay is tightened. With a top-rigged rig, on the other hand, almost the entire tension of the backstay is transferred to the forestay. This is why it is particularly important to create a slight pre-bend with a top-rigged rig, as otherwise the backstay can hardly bend the mast.
The backstays, which are mainly found on partial rigs, act like an additional backstay. If they are put under tension, this goes directly to the attachment point of the forestay, so they serve to regulate the forestay tension. The backstay is then primarily used to bend the mast, especially in strong winds, in order to trim the mainsail flatter due to the greater bend.
A disadvantage of rigs with neutral spreaders is that they have to be trimmed more carefully while sailing, can work hard in the centre of the mast without trim and can lead to mast loss due to incorrect operation.
Basic trim with neutral spreaders step by step
- Tension the upper shrouds to 15 per cent of the breaking load.
- Sight upwards over the mast groove and trim the centre of the mast straight with the lower shrouds. If there are front lower shrouds, trim with these. For two or more spreader rigs, tension the centre shrouds to about the same extent as the front lower shrouds, always checking the mast groove.
- Use the front lower shrouds or the baby stay to give the mast a slight pre-bend. This is particularly important with the top rigging, as otherwise it is hardly possible to bend further with the backstay.
- Tension the aft lower shrouds only slightly. They must allow the mast to bend forwards, but at the same time limit this bending.
- Tension the backstay and back stays to 15 to 20 per cent of the breaking load. The mast should now have a bend in the centre in the longitudinal direction that corresponds to about half the profile depth of the mast. Mark this setting as the maximum tension that should not be exceeded under sail. Otherwise, the mast may bend too much and sag, reducing the tension on the upper, lower and intermediate shrouds.
- To check, push the backstay through only slightly and check the bend again. It should now only be 15 to 20 millimetres.
- Never loosen the backstay and - if present - the backstays completely under sail. Otherwise the masthead can be pulled forwards and the mast can bend negatively and collapse.
Trimming instructions for rigs with swept spreaders
The rig used today is easier to handle when sailing than rigs with neutral spreaders, but requires a lot of tension on the upper shrouds.
Variants for such rigs
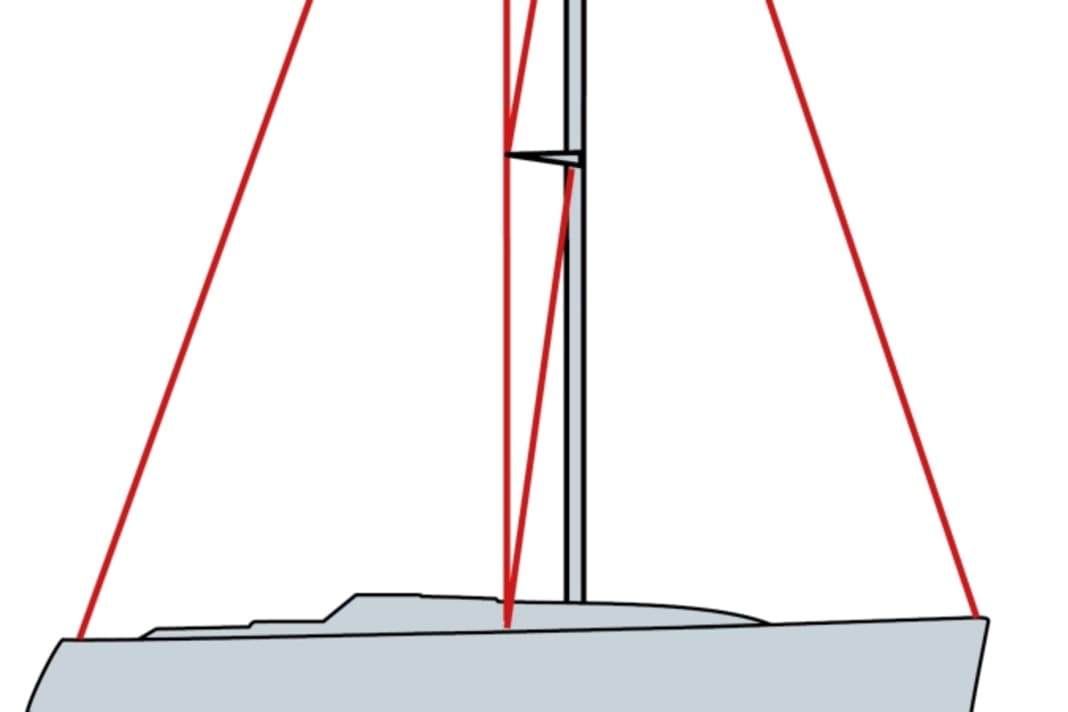


Rigs with swept-back spreaders, i.e. which project slightly aft of the mast, have a major advantage over those with neutral spreaders: They are much easier to handle. Back stays and forward lower shrouds or baby stays can be omitted as they are not needed to trim the mast lengthways. If the sweep of the spreaders is strong enough and the upper shrouds are positioned on the outside of the hull, a backstay is not necessary, at least for smaller boats. Very wide mainsails are then possible, even with a so-called squarehead, as the leech of the mainsail cannot get caught on the backstay during manoeuvres.
Due to the angle of attack of the spreaders, the upper shrouds are positioned slightly aft of the mast. This means that their pull is not directly across the mast, but slightly to the rear. In addition to the lateral bracing of the mast, they therefore partly take over the function of the backstay or even replace it. This is possible from a sweep angle of around 18 degrees. In addition, the desired forward bend of the mast can be achieved much more easily with the upper shrouds than with neutral spreaders, as the shrouds push the mast forwards via the spreaders.
But this variant also has disadvantages. If the backstay is missing, the forestay can only be pushed through by pulling on the upper shrouds, which means that this must be very high. Otherwise, the backstay has the same effect as on rigs with neutral spreaders. In the case of top rigging, its main purpose is to tension the forestay; the further its attachment point moves downwards, the more its bending effect increases. But be careful: even rigs with swept spreaders are sometimes vulnerable when sailing, especially partial rigs. Too much tension on the backstay also causes the tension on the upper shrouds to decrease, as the bending of the top brings it closer to the attachment points of the shrouds and the tension on the shrouds decreases. This can cause the mast to become laterally unstable. This is why aft lower shrouds are also important here to limit the forward deflection.
Basic trim with swept spreaders step by step
- Tension the upper shrouds to about 15 per cent of the breaking load. The backstay can be pushed through slightly to reduce the load on the threads. Do not remove the folding rule yet.
- If there are front lower shrouds or a baby stay, tighten them slightly.
- Use the mast groove to check that the mast is straight. If necessary, correct with the front lower shrouds, otherwise with the aft lower shrouds. For multi-saloon rigs, also tighten the centre shrouds slightly and use them to correct the lateral bend if necessary. Do not tighten the aft lower shrouds too much, the mast must be able to bend further forwards under sail with the backstay tightened in order to trim the mainsail flatter.
- Tension the upper shrouds to 20 per cent of the breaking load, noting how many turns are required for a 5 per cent increase.
- Check the lateral bend again via the mast groove
check the lateral bend and trim if necessary. - Push the backstay and, if present, the backstays hard, but with no more than 20 per cent of the breaking load. Mark this setting on the backstay and back stays as the maximum tension. The mast should now bend strongly forwards in the centre, but not more than 1.5 times its profile depth or 2 percent of the height of the foresail triangle.
- The bending of the mast reduces the tension on the upper shrouds, check them again and bring them back to 20 per cent breaking load.
- Fasten the backstay and backstays until they are tension-free. The tension on the upper shrouds must now not exceed 25 per cent of the breaking load.
Setting the correct shroud tension
Special tension gauges are available to determine the tension on shrouds and stays. But you can also use the folding rule method.


The method with voltmeter
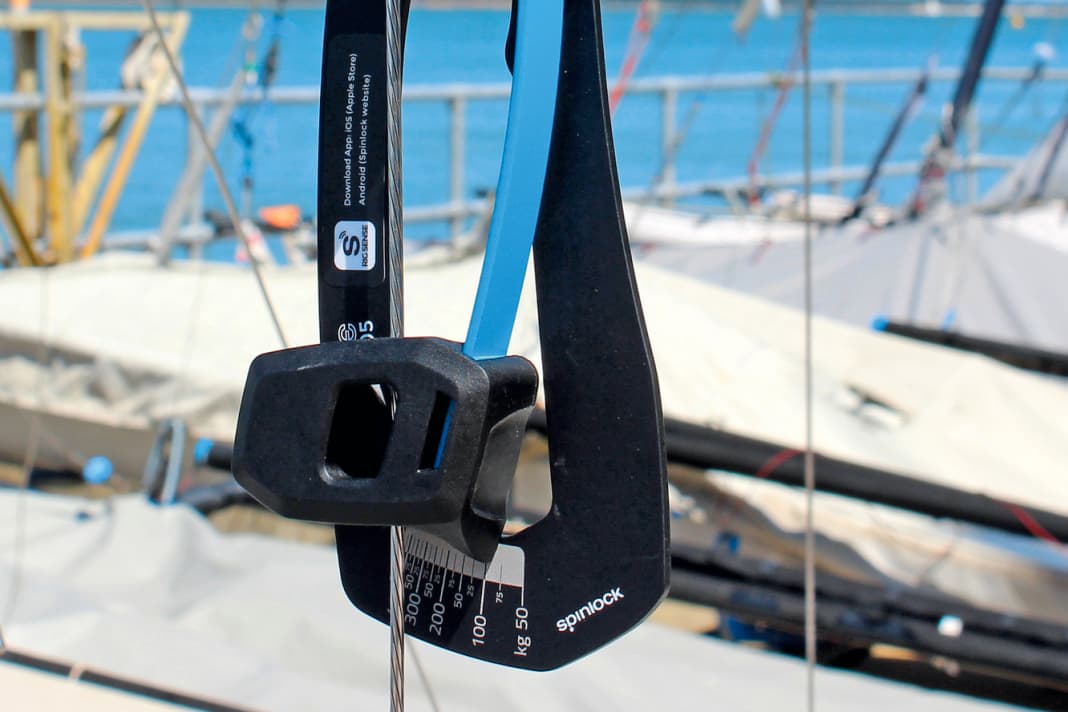
If the breaking load of the shroud or stay is known (see table) and a tension meter is available, this can be used to determine the exact shroud tension and its percentage share of the breaking load. A 1 x 19 wire with a diameter of 5 millimetres has a breaking load of 22 kilonewtons. Since tension meters such as Rigsense with kilogrammes should first be converted. 22 kN = 2250 kg (rounded). If 15 per cent of the breaking load is to be achieved, the shroud tension must be increased until 337 kilograms are shown on the scale. When tensioning one shroud, make sure that the other shroud is also tensioned. In other words, tension the shrouds alternately until the desired value is reached.
The folding rule method
As wire expands with increasing tensile strength, regardless of its thickness, the tensile strength can also be determined using the expansion. The folding rule method is used for this purpose.
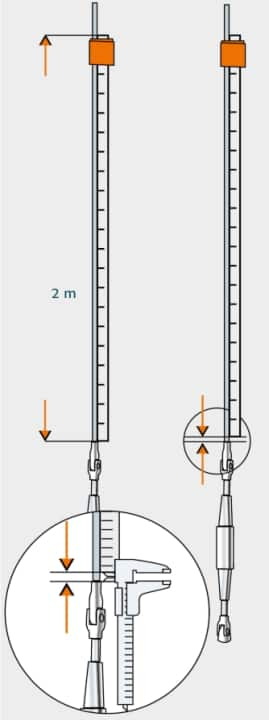
For 1x19 wires, the most commonly used for rigs, an elongation of 1 millimetre corresponds to 5 percent of the breaking load of the wire. Other values apply to other designs such as Rod or Dyform (see table).
To adjust the rig, attach a 2 metre long folding rule to the loose shroud, as loosely as possible, at a distance of about 5 millimetres from the terminal, for example with tape. The distance to the terminal is necessary to get the measuring legs of a caliper between the terminal and the folding rule. Note the exact distance (A). Now tighten the shroud until A+1.5 millimetres is reached, then tighten the opposite shroud until the measurement is A+3 millimetres. This corresponds to a shroud tension of 15 per cent of the breaking load. Use the corresponding values for Rod or Dyform. The breaking loads on stays can be determined in the same way, but it is a little more difficult to attach the folding rule.
Night trim under sail
The control on the water is used for fine adjustment. It should also be repeated
It should also be repeated more often during the season, as boats change under load.
Incorrect trim and countermeasures
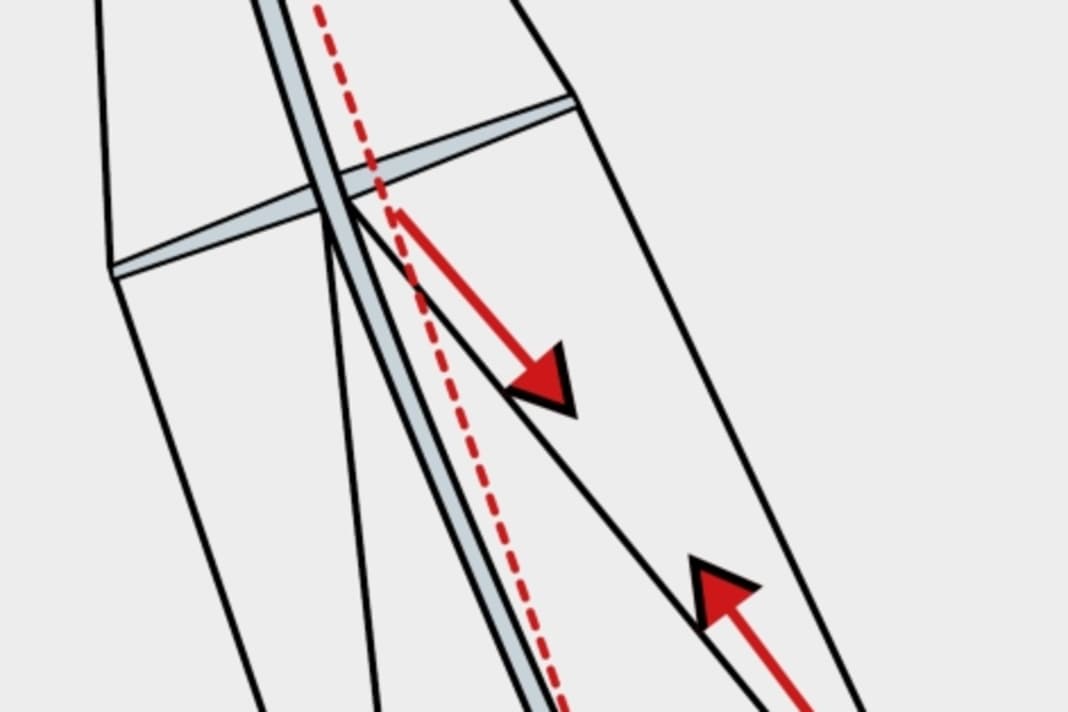


Ideal conditions for testing the rig trim are around 3 Beaufort and as little swell as possible. On an upwind course, check the bending curve of the mast along the mainsail luff, i.e. in the longitudinal direction. The mast should bend harmoniously slightly forwards. If it is too straight at the bottom, the lower shrouds may be too tight; if it does not bend sufficiently at the top, the backstay must be tightened. In the case of stepped masts that stand on the keel, a bending curve that is not harmonious may also be due to incorrect clamping between the mast base and the deck. It is best to ask the rig manufacturer or a sailmaker about this. Radial or diagonal folds from the clew into the sail are an indication of excessive mast bending. Their direction points to the area of excessive bending.
The lateral bending curve is controlled along the leading edge of the mast or the mast groove. With clear partial rigs, such as 7/8 rigs, a slight lateral bend may be desired. If the top of the mast moves to leeward in strong winds, the leech opens, the centre then bends slightly to windward and trims the mainsail flatter. However, top-rigged rigs should not bend sideways in the top area.
bend sideways. The upper shrouds are usually too loose, and this is often
often recognisable by a loose lee shroud.
If the mast bends inharmoniously between the top and foot or only in the centre to one side, the trim of the lower or intermediate shrouds is usually responsible. Trim accordingly on the water, but never change the tension of the upper shrouds. Then reef the mainsail and take another bearing on the mast. If it sags more than 5 millimetres in one direction, counteract this with the corresponding lower shroud.
Plastic yachts, and wooden boats in particular, change over the course of the season. The bow and stern are lifted slightly by the constant pull of the forestay and backstay. This can even be the case in the dumping area, it is completely normal. Therefore, check the basic trim more often during the season and readjust if necessary.
