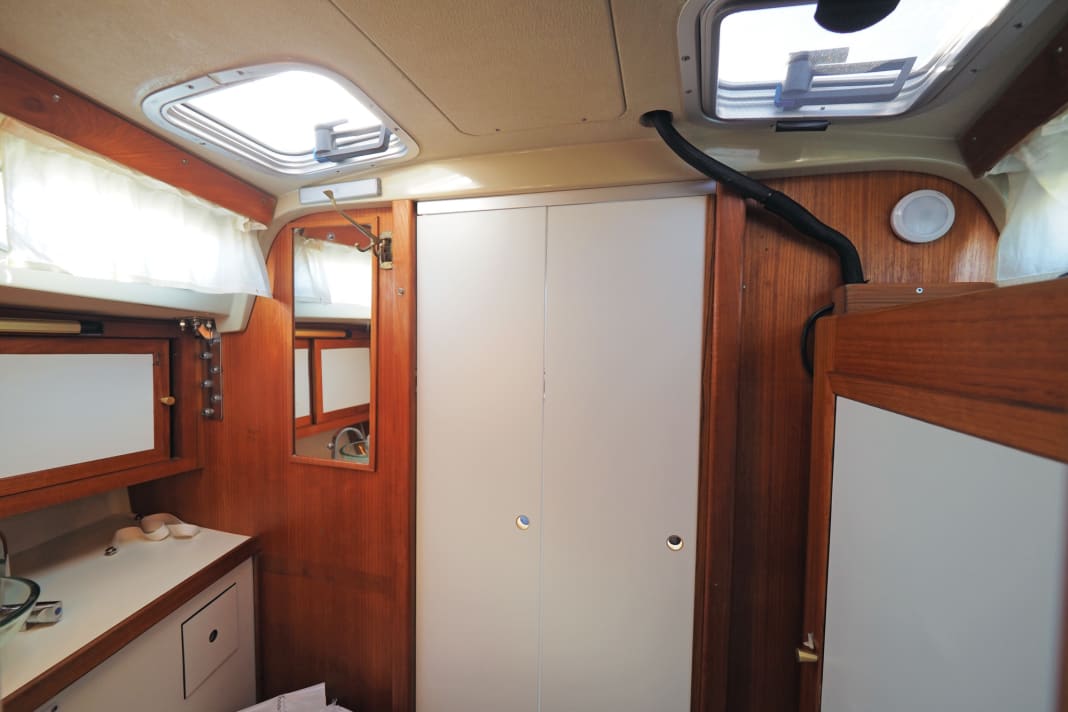


The more natural light there is below deck, the friendlier and more inviting the interior appears. Deck hatches make a major contribution to this, although they were used rather sparingly, especially on older yachts.
Older designs usually have a larger hatch in the foredeck than modern boats, as it used to be important to get the staysail foresail comfortably below deck. However, there is usually potential for optimisation in the saloon or wet room. The shipyards have often saved on additional openings there. The LM 290 Mermaid in our interior refit is no exception.
Interior Refit series:
- Part 1: Simply try out how the new style can be simulated with on-board tools
- Part 2: Colour change, how dark Scotsmen become white and friendly
- Part 3: Light and air, how to retrofit deck hatches correctly
- Part 4: Setting accents, how LED lighting creates new cosiness (to follow)
At least the Danes have provided good permanent ventilation with two Dorade hoods, but this does not allow any light below deck. Thanks to the two relatively large side windows, it was not directly dark in the wet room, but owner Andreas Woyda was dissatisfied with the lighting situation. The remodelling of the cupboards and bulkheads presented in the last episode exacerbated the situation, at least visually, as the wet room looked downright dark compared to the bright saloon.
Various retrofit hatches with advantages and disadvantages
The dorade ventilators should therefore be replaced with additional hatches. Corresponding models are available from almost every established manufacturer such as Gebo, Goiot, Nemo, Moonlight, Lewmar or Vetus. Thanks to the large selection, it is easy to find a model that matches the style of the other hatches and windows. The main criterion for selection is, of course, the right dimensions for the planned installation location, but you should also pay attention to the accessories. Not all products are available with matching fly screens, sun visors or a prefabricated inner frame, also known as a trim kit. The latter is highly recommended and makes retrofitting much easier.
There are differences in the way the panes are attached; not all models allow the artificial glass to be easily replaced. A hatch that has been scratched or cracked by UV light must then be completely replaced. The type of locking system or the installation system are generally only relevant for larger hatches. The smaller versions use very similar systems.
We opted for the Flushline model from Gebo with an outer dimension of 33 centimetres and an aluminium inner frame. The hatch can be opened 180 degrees and has a friction hinge, meaning that the pane remains in any position and does not need to be secured with a stand.
Installing the hatches is not a major challenge - if you pay attention to a few points
Firstly, the hatches require a flat contact surface. The curvature must not be more than one millimetre over the size of the hatch, otherwise the frame will warp when screwed tight and it will jam or not close properly. In such a case, a filler frame must be built to compensate for the deck gap. It must also be ensured that the hatch is not installed in a structurally sensitive area of the deck.
This point initially gave us cause for concern on the LM 290, as the wet room is located directly under the foot of the mast on deck and the cut-outs are therefore in a potentially structural part of the superstructure. However, after a thorough inspection, master boat builder Woyda gave the all-clear. The rigging forces of the LM are distributed to the bulkheads by a solid steel frame hidden in the deck. The deck itself therefore has no load-bearing function in this area, and the cut-outs for the hatches do not weaken the structure of the boat.
Also important: Some hatches must be opened a full 180 degrees for installation. This can lead to problems if the hinge is to be positioned near a raised section of the body. This is because the hatch cannot be opened fully and the screws in the hinge area cannot be tightened.
The right screws for retrofitting
With wooden decks, it is only necessary to pre-drill with the diameter that matches the screw. This is also important for solid GRP laminate. The material hardly yields, which is why the screws tear off quickly when tightened if the pre-drilled holes are too small. In addition, the holes should be countersunk deep enough so that the screws do not catch in the gelcoat, otherwise the brittle fine layer will break out easily.
If it is a sandwich deck like the LM, the core material around the cut-out must also be removed, in a strip wide enough to cover the screw holes. The cavity is then filled with filler to create a solid deck structure in this area.
Thickened epoxy resin can be used for this, but polyester filler is also sufficient. The main aim is to protect the core material from moisture in case the sealant on the screws fails and leaks occur. This is particularly important for balsa wood decks, otherwise the core will turn into mouldy peat over the years.
The great advantage of self-tapping screws is that no nuts need to be covered on the underside of the deck and the inner frame can be correspondingly delicate.
For larger hatches with friction hinges, however, the self-tapping screws reach their limits. The heavier the disc, the more torque is transferred via the hinge to the frame and the fastening, which is why large hatches should be screwed through the deck at the hinges using machine screws. However, corresponding instructions for installation can usually be found in the installation instructions supplied with the model by the respective manufacturer.

