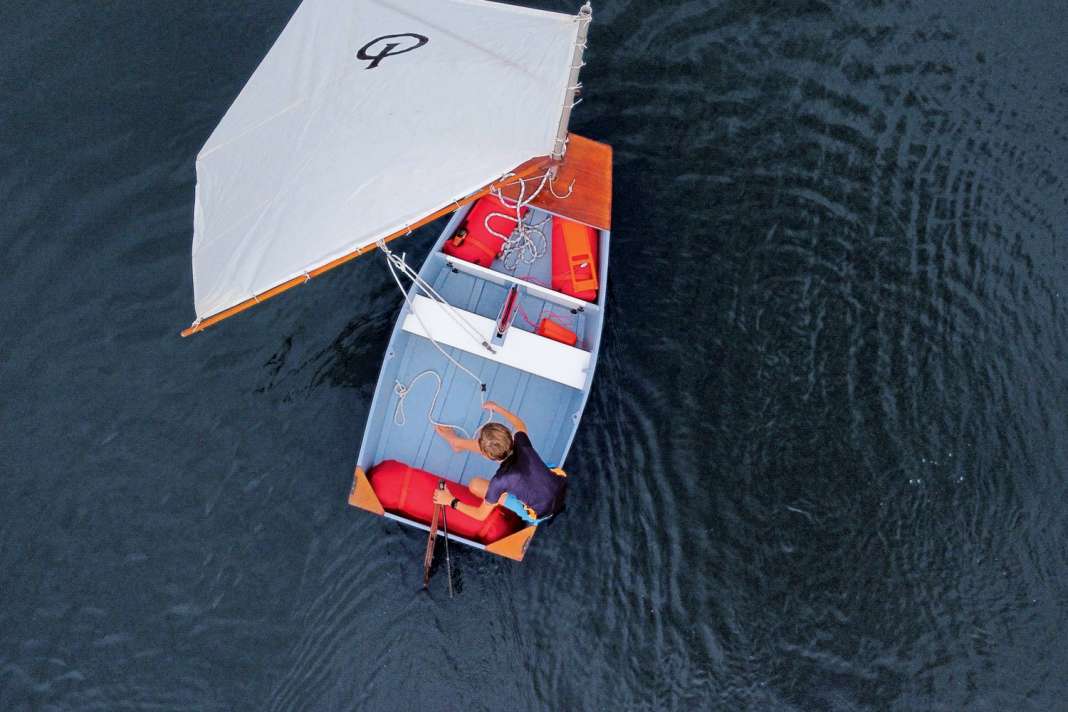


Optimists are sometimes popular as dinghies. The angular children's and youth dinghy can be either rowed or sailed. Even a small outboard motor fits on the stern. Another advantage: there are a lot of Optis out there, which is why they are often cheap to buy second-hand. Perhaps the most important
aspect, however, is that many adults feel pure nostalgia as soon as they squeeze into the small boat and memories of their own sailing beginnings come flooding back.
However, when stowing away on board, it often turns out that an Optimist is not so small after all. At 2.30 metres long, it takes up a lot of space. On many yachts, it barely fits on the cabin superstructure under the main boom. Similarly, the boot of even an estate car is usually too small to take the Opti to the boat. So what to do?
You can find more instructions for boat projects here:
Basically, the answer is obvious: the Opti has to be sawn up. Sounds martial, but it's quite simple. The two parts are then simply put back together for sailing. Important: The boat is divided into two halves of different lengths so that one fits inside the other. In this way, the Optimist becomes a practical stowaway dinghy: sailable, space-saving and also pretty to look at if you choose an old wooden model.
Precise preparatory work is required
Before the saw is set to work, measurements and planning must be carried out to ensure that everything will fit later. Above all, the Opti should remain stable and watertight. It is therefore best to install two additional bulkheads. This way, each half is rigid in itself and stays dry while sailing. They are simply joined together using four tommy screws.
When measuring with the folding rule, it quickly becomes clear that there is only one logical place for the division on our Opti: directly in front of the centreboard box. There is nothing in the way, and the bow section will later fit perfectly in the cockpit. Incidentally, it is advisable to install the two bulkheads first before sawing. This ensures that they are parallel to each other and that the Opti does not become crooked after the conversion.
To ensure that the bulkheads fit exactly into the fuselage, it helps to make a template. Five millimetre thick plywood is ideal for this. This is stiff enough to be fitted precisely. However, it is still very easy to saw and sand. It can also be used as a spacer when laminating the bulkheads. Important: The template bulkhead only reproduces the cross-section of the hull at one point. However, as this tapers significantly towards the bow, the two bulkheads must be different sizes and the lateral cut edges bevelled. Despite the template, additional measuring and some sanding work is therefore necessary.
A gap is sawn in the coaming so that the bulkheads can finally be placed in the correct position in front of the centreboard box. This is because several squared timbers are installed lengthways as reinforcements in wooden optis. This was no problem for the thin, flexible template. However, space had to be created for the less flexible plywood bulkhead.
First laminate, then saw
The substrate is prepared before insertion. A fillet of thickened epoxy and an angle laminate are used to fix the bulkheads in place. To ensure that the resin holds, the old paint must be removed from the area in question. This is quickly done with a scraper. The bulkheads are then fitted and marked.
Conveniently, they can be fixed to the centreboard box with screw clamps. Additional boards and screw clamps are used to press the bulkheads together with the template in the centre. This ensures that they lie flat against each other later.
Once everything fits and is marked, the glass fibre fabric is cut to size. Our Opti uses three layers of glass fabric, each weighing 163 grams per square metre. Then epoxy resin is mixed, the bonding surfaces are coated and glued with thickened resin. Firstly, the bulkhead directly in front of the centreboard box, then the additional sheet is wrapped in foil to prevent it from sticking later. And finally the bulkhead for the bow section. Finally, everything is fixed in place with the screw clamps along the prepared markings. Now the fillet is pulled out and the prepared strips of fibreglass are placed in the angle between the bulkhead, fillet and fuselage and soaked in resin. Finally, apply the tear-off fabric - finished.
Gluing and laminating the bulkheads takes about two and a half hours. All other work can be divided into shorter sections.
Incidentally, imitators can deviate from the photo sequence at this point. We not only painted the angled laminate, but the entire Opti inside and only then sawed it. If you want to keep everything in the same colour, you can also saw it first and apply the varnish later.
Turn one into two
Before sawing, the former template is pulled out from between the bulkheads. Then drill holes at the points where the two boat halves will later be joined together using toggle bolts and drive-in nuts. Drilling the holes before sawing ensures that both sections are aligned later.
The five millimetre gap forms the guide for the saw. It is best to use a Japanese saw or a fox saw. You could accidentally saw into the bulkhead with a jigsaw. Once the Opti has been sawn in half, it is advisable to reinsert the allowance on this side and press the bulkheads together using a screw clamp. This prevents the side wall from breaking in the last few centimetres because the Opti falls apart before the cut can be finished cleanly. The trick with the gap as a guide for the saw means that some of the side wall protrudes over the bulkheads after sawing. Sand this area flush! As a result, the Opti is five millimetres shorter after the conversion.
Once the Optimist is divided into two halves, the bow section is placed in the cockpit on a trial basis. Now you can see whether the measurements were correct before the conversion. With our wooden opti, a cut-out in the seat bench would be possible in an emergency if a few millimetres were missing.
As soon as the bulkheads are painted, the drive-in nuts can be placed. Alternatively, wing nuts will do. But then you would have four individual parts that could get lost. To find the correct position, connect the two fuselage halves with the tommy screws and the drive-in nuts. Then make sure that everything is exactly aligned and tighten the tommy screws until the drive-in nuts are slightly pulled into the plywood. The last millimetre is countersunk with a targeted hammer blow. This ensures that they sit straight and that the tommy screws can be screwed in later without any problems.
Final touches
The conversion is now almost complete, the only thing missing is the fittings in the Opti. The webbing straps for the buoyancy bodies, sheet blocks and the rubber for securing the centreboard must be screwed back on. If the two air tanks are to be placed in the foredeck again, they must now be moved a long way forwards in front of the new bulkheads. In our case, they fit under the mast bench that spans the entire foredeck.
The aft buoyancy chamber must always give way if the Opti is to be stowed to save space. To do this, simply deflate it. It can then be packed next to the centreboard box. To avoid scratches and scrapes when stacking one inside the other, it is advisable to cut foam padding or rubber mats to size. They serve as a base for the front section. A lashing strap can also be attached. This is particularly helpful if the Opti is stored on edge. If the Opti is stored on the cabin superstructure, a tarpaulin is required to prevent rain from entering. Unless it is stowed lying keel up. In this case, however, the bow section protrudes slightly over the coaming of the stern section, so that a suitable bracing would have to be made.
The first strokes with the converted Opti show that the sailing characteristics have not changed. The screw connection on the additional bulkheads holds perfectly, the additional weight is negligible for use as a sailing dinghy. However, the bulkheads do have one disadvantage: rain and spray water no longer flows aft into the cockpit, where it can simply be cleaned off outboard. Instead, water collects in the foredeck and has to be collected there with the bailer.
The entire conversion took around 25 hours of labour. Costs of just under 250 euros were incurred for plywood, toggle bolts, drive-in nuts, resin, fibreglass and paint as well as consumables such as film, adhesive tape and abrasives. The advantage of easy transport in the car and on deck makes the Stowaway-Opti the perfect sailing dinghy. They say that happiness is the only thing that increases when you share it. This applies equally to the Opti.
Instructions: Step by step to the halved Optimist
1. take measurements and create a template
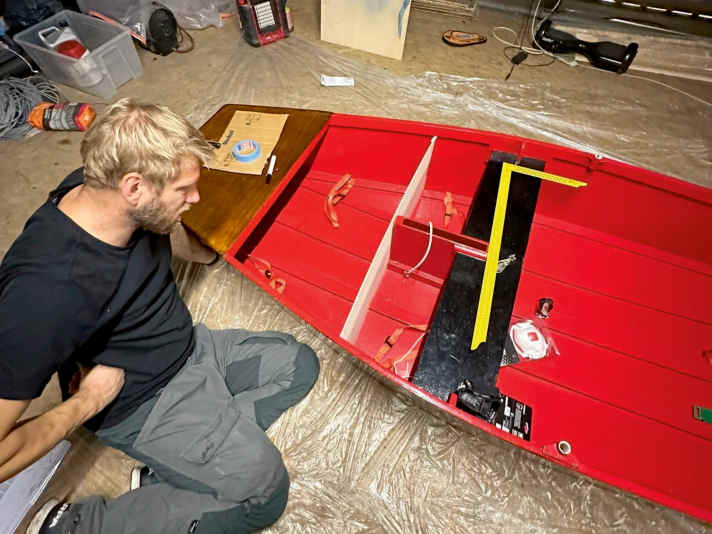
First, the area in front of the centreboard box is measured and a template made from five millimetre plywood.
2. create bulkheads
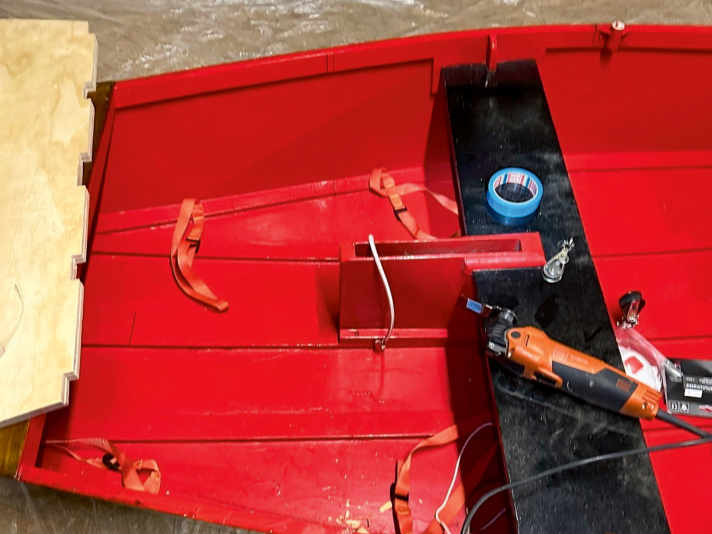
Using the template, two bulkheads are sawn out of twelve millimetre plywood and adapted.
3. coaming cut-out
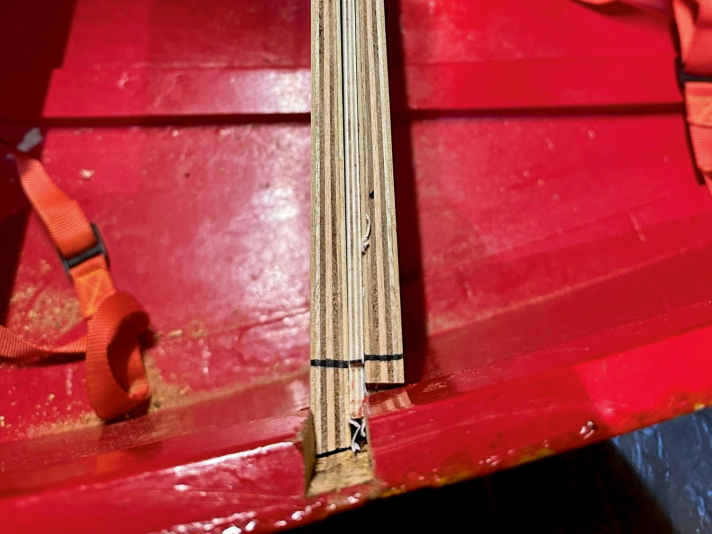
A cut-out in the coaming is required to insert the bulkheads. The template is inserted in between as an allowance.
4. every millimetre counts
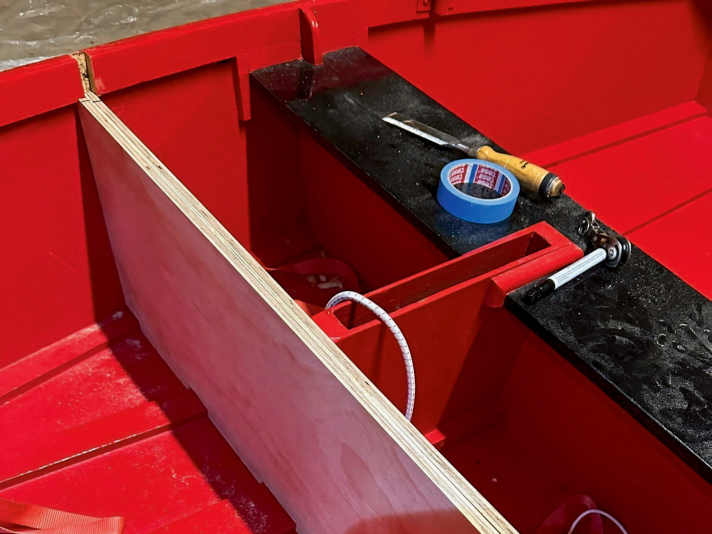
Precise measurements must now be taken to ensure that everything is straight later on. Touch-ups can be carried out with the sander.
5. away with the paint
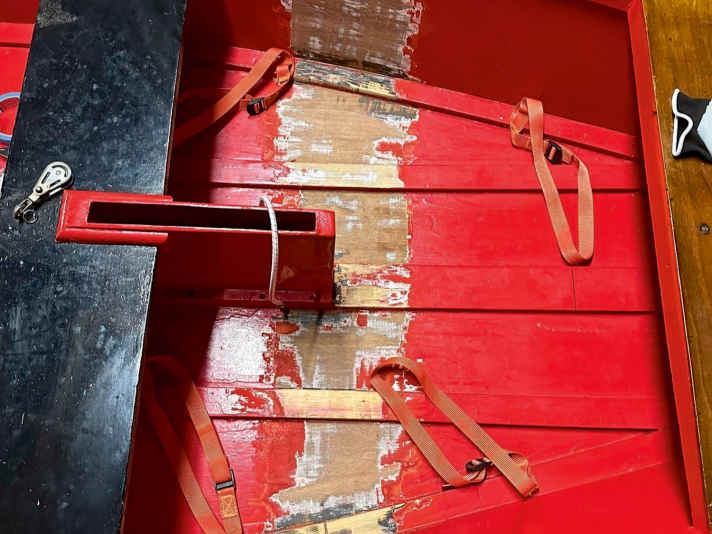
The paint under the bulkheads must be removed so that the bonding holds. This can be done quickly with a scraper.
6. prepare the workplace
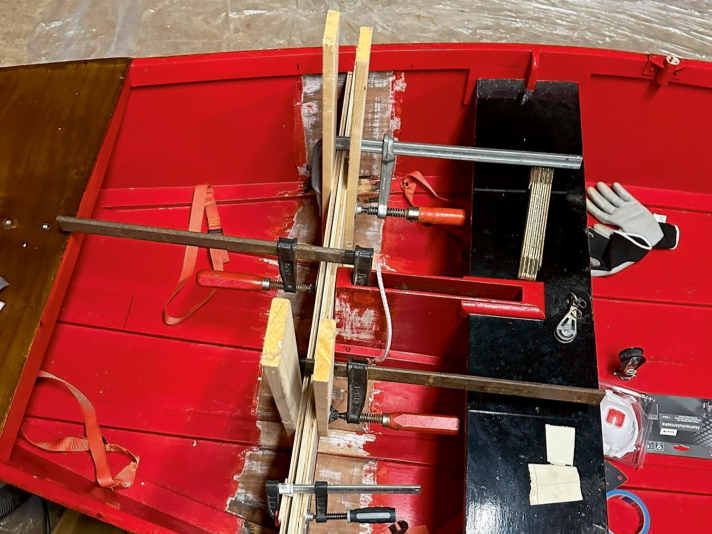
The bulkheads are fixed to the centreboard box using screw clamps. Additional clamps ensure that they are parallel.
7. prepare material
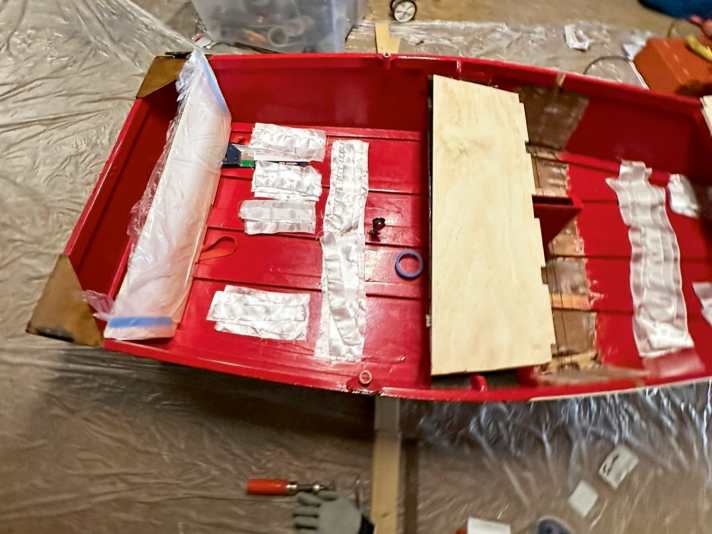
Preparation of the glass fibre strips. It is best to wrap the fibreglass with foil. Then it can be laminated.
8. lamination
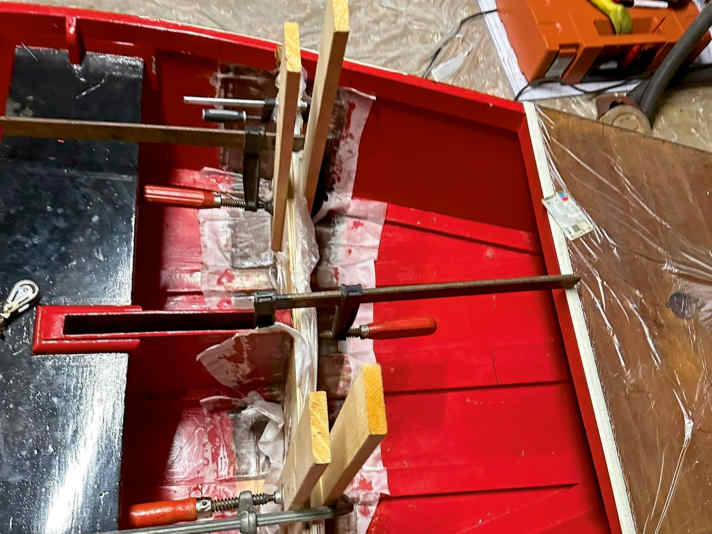
Use thickened epoxy to create grooves and laminate the glass mats over them. Then apply peel ply.
9. reworking
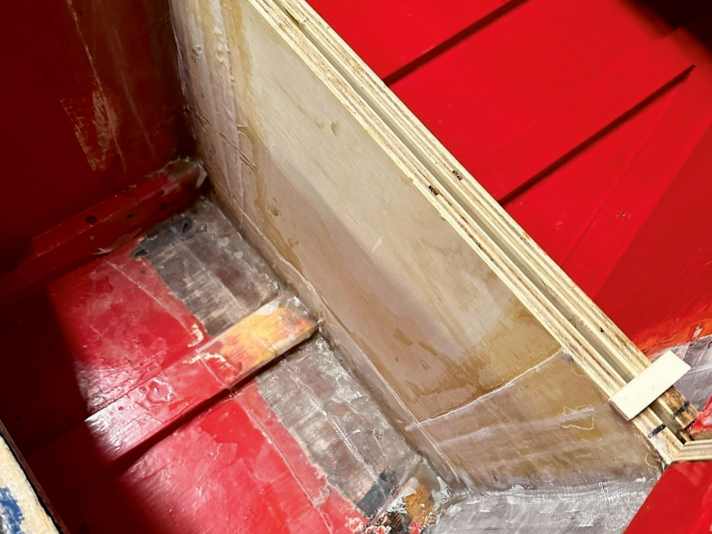
After curing, the filler is removed, leaving a gap for the saw. Any unevenness is sanded.
10. coaming closure
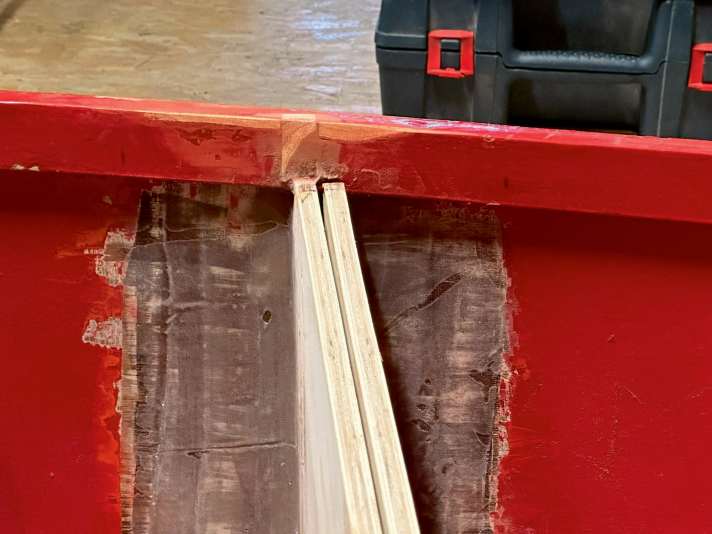
The gap in the coaming is closed again with a wooden block and the laminate is smoothed with filler.
11. varnishing
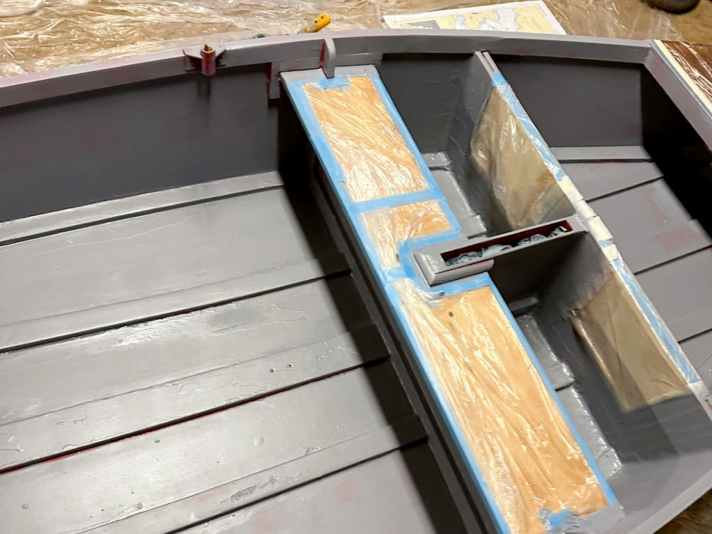
Painting bulkheads and angle laminate. In our case, the inside of the boat was completely painted over once.
12. before sawing
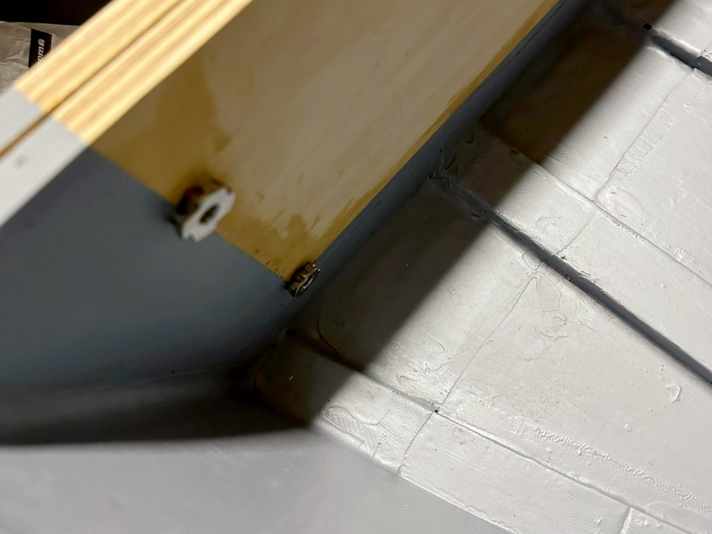
Before sawing, mark the positions of the screws with a hole. The drive-in nuts can be seen here.
13 Now it's time to saw
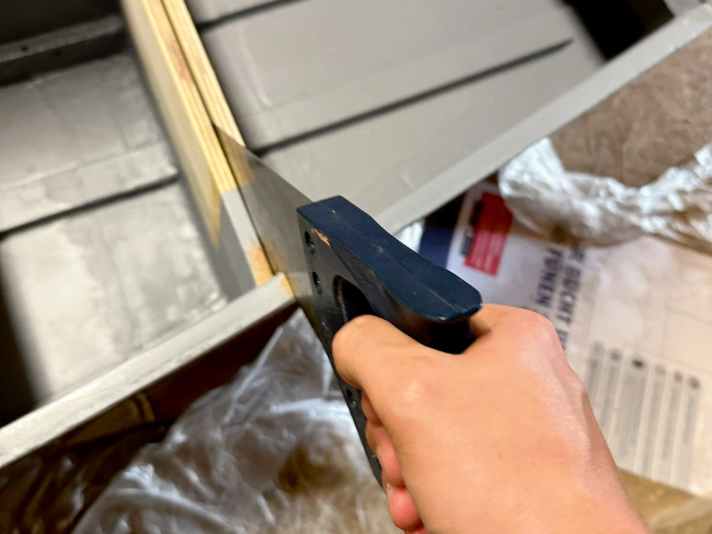
The big moment: the saw is set to work. The Japanese saw or foxtail is used to carefully cut along the bulkheads.
14 Does everything fit?
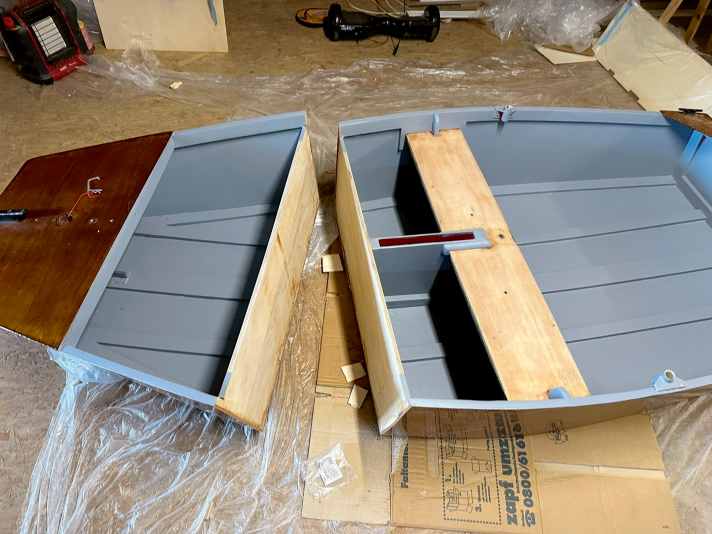
There's no turning back now! The Opti is sawn to pieces. First we test whether the bow section fits into the cockpit.
15. reworking of both parts
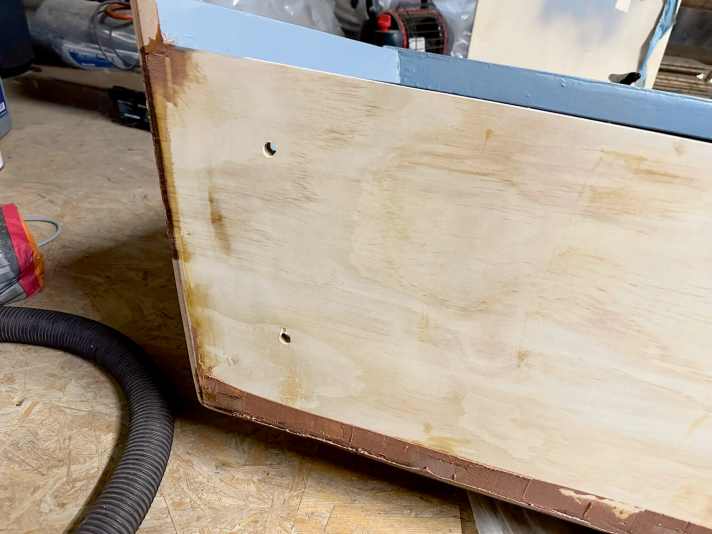
Sand the cut edges and smooth out any unevenness and small gaps or gaps with filler.
16. everything in flight?
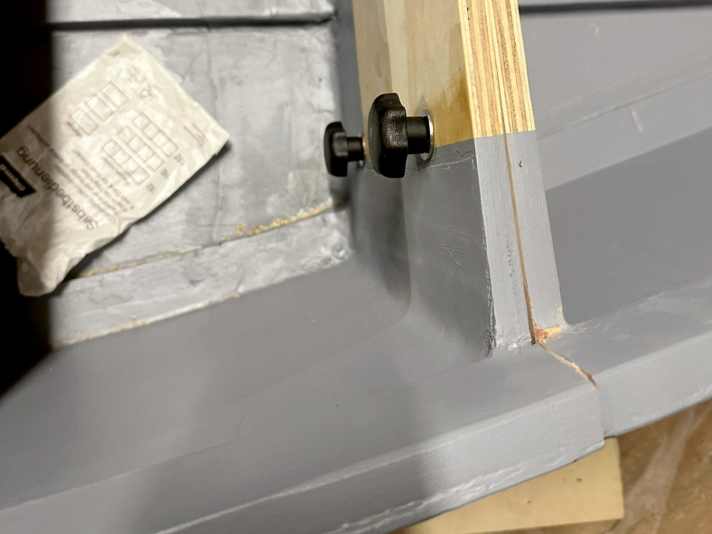
Test-fit the drive-in nuts and tommy screws and check that the two sections are aligned.
17. varnish cut surfaces
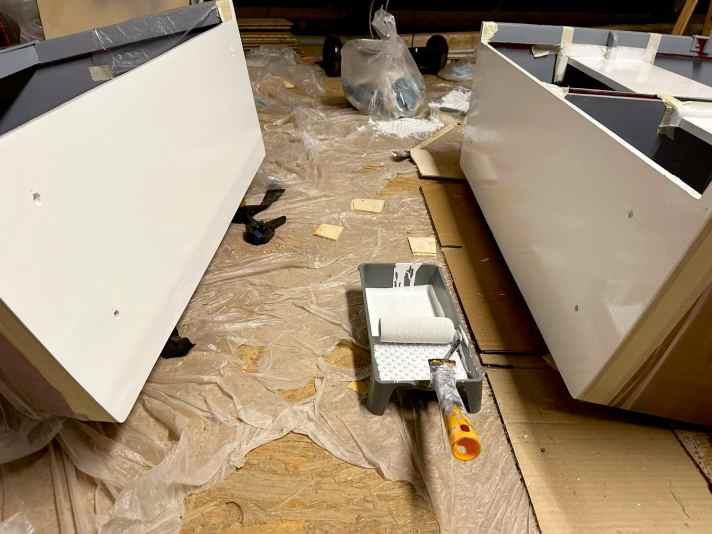
Once everything fits and the surfaces have been levelled and sanded smooth, it's time to paint.
18. reattach hardware
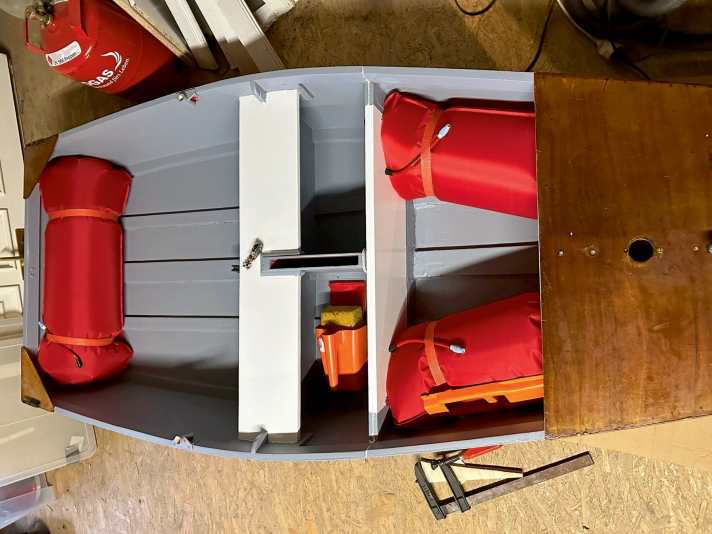
Sheet blocks and the straps for the flotation devices are reattached. The outrigger straps are still missing here.
19. ready for space-saving transport
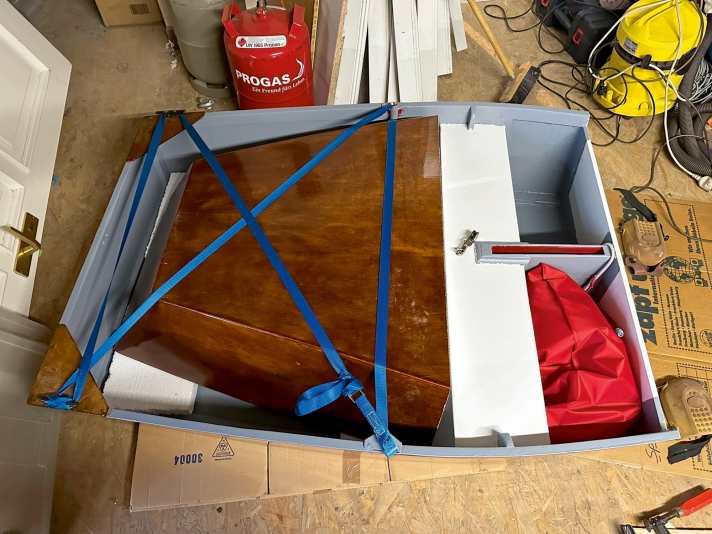
With some foam padding and a lashing strap, the Opti can now be packed up to save space.
