

The substructure of the deck is almost identical from the dinghy to the classic ocean-going yacht. Running parallel to the upper edge of the sheerline (top plank) is the joist beam, which is used to support the deck beams. The connection between the deck beam and the beam spreader is usually made using a dovetail so that tensile forces can be absorbed in a form-fit manner. As a rule, the deck beams are fitted with the same beam bight from fore to aft. Only in the metre classes, especially in the 12-metre classes, does the beam cove vary in the middle area for measurement reasons.
The deck beams are interrupted for the cockpit, cabin superstructure or hatches, the centre ends then rest in the cockpit, cabin or hatch sling. The short beams from the sling to the beam path in the area of the cabin superstructure, hatches or the cockpit are called "half beams". Larger yachts are also fitted with metal (usually bronze) tension rods that connect the beam spreader to the sling in order to better absorb the tensile forces that occur in the sea.
To reinforce the hull-deck connection, deck beams and frames are joined together by forged vertical knees. Deck beams are usually made from oak or ash, and for lighter boats also from spruce, while joists are often made from larch, Oregon pine or pine.
Linen decks
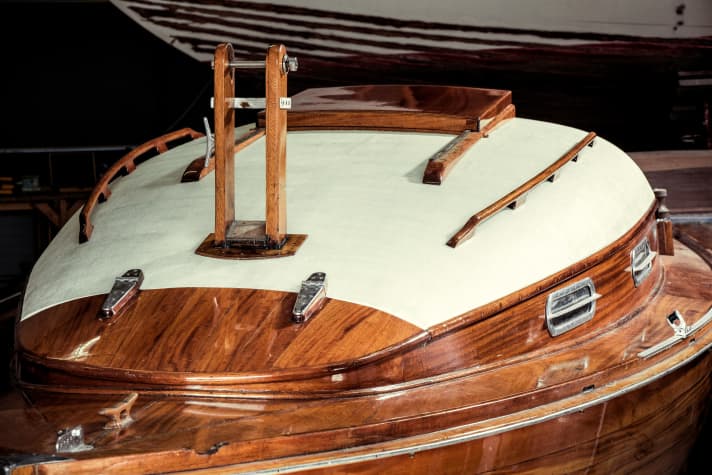
Linen is one of the oldest and most classic types of decking for cabin roofs and running decks. The planks made of light coniferous wood such as spruce, pine or fine-grained larch, more rarely also spruce, were nailed directly to the deck beams with tongue and groove and the tightness was created by the linen covering.
Most canvas decks are now getting on in years and are prone to cracking. It is not uncommon for the deck planks underneath to show signs of rot. The "black iron" (non-galvanised) deck rails of cabin roofs made of light softwood are particularly susceptible to moisture-induced corrosion damage.
If you decide to reupholster the canvas deck due to the advanced ageing process, you should first replace any damaged timbers. Instructions for renewing the canvas cover can be found in the chapter on superstructures.

Classic bar decks
Decks on high-quality classic yachts are usually planked with teak. Spruce, very fine-grained larch or Oregon pine was also used for skerry cruisers or Nordic pointed creels. The gunwale runs parallel to the outer deck line on a classically laid stave deck. The floorboards run around the cabin superstructure and the hatches. The centre planks are formed by a "fish" that is "butted" or straight on the sides, into which the deck planks run laterally.
Together with the gunwale and the fish, the gunwales form the frame for the deck planks, the ends of which they protect. For visual reasons, they are usually made of mahogany and varnished, while teak is left untreated.
Coniferous woods were often used for the bar deck on skerry cruisers or pointed gates
The body timbers and the gunwale are cut out of a plank in a straight line, i.e. curved, while the deck planks are bent in. If the curvature of the outer deck line is too strong or if the boat is to be given a more slender character, shorter planks with less curvature can also be incorporated into the bulwarks of the gunwale. On motorboats, the deck planks always run parallel to the midship line.
Larger yachts are fitted with a setboard on the outer edge of the gunwale, which is finished at the top with a comb moulding, usually made of varnished ash or mahogany.
Whilst the joists and the fish are screwed to the deck beams, the planks were often nailed undercover. The nails were driven alternately into the deck beam and into the neighbouring plank to join the deck planks together. The advantage of this method is that the deck planks are fastened invisibly to the deck beams. The disadvantage, however, becomes clearly visible at a certain degree of wear: the nail heads gradually emerge from the deck.
Get wooden decks tight
For the time being, the heads can be removed and covered with a bung, but in the long term the overall strength of the deck will suffer and it will have to be replaced. In the case of a plugged deck, the screws can be removed (if they are made of bronze) and the plug holes countersunk deeper so that they can be re-screwed.
In order to achieve the desired tightness, planked decks were caulked and sealed with marine glue. Today, this task is largely performed by permanently elastic joint sealants. When using these "modern" products on a classic yacht, however, it should first be determined whether the planked deck has sufficient tension or, if there are leaks, whether it should be re-caulked before re-grouting. The damaged rubber joint sealant must be removed both before re-caulking and before re-pointing the deck.
A deck planked directly onto the deck beams is more susceptible to leaks than a deck laid on plywood as described below. On the other hand, it is easier to localise leaks on a classically laid beam deck.
Bar decks on plywood
In the mid-1960s, a start was made on laying a layer of plywood on top of the deck beams and a less thick rod deck on top of that. Such a plywood deck is more torsion-resistant than a "merely" planked plywood deck and has a more durable seal. However, if the bonding of the decking to the plywood is faulty or outdated, allowing water to penetrate through the deck joint or causing the battens to detach from the plywood, there is a risk of considerable rot damage to the plywood.
One method of detecting detachment of the decking from the plywood is the so-called "knock test", in which the deck is tapped with a plastic hammer. If detachments are present, they can be recognised by the distinctly different, "springy", almost "rattling" sound. If detachment is detected on a "teak on plywood" deck, for example by creaking, during the "knock test" or by noticeably soft spots, urgent action is required. Firstly, check whether there is moisture between the teak and plywood.
Glue individual deck bars in place with epoxy resin
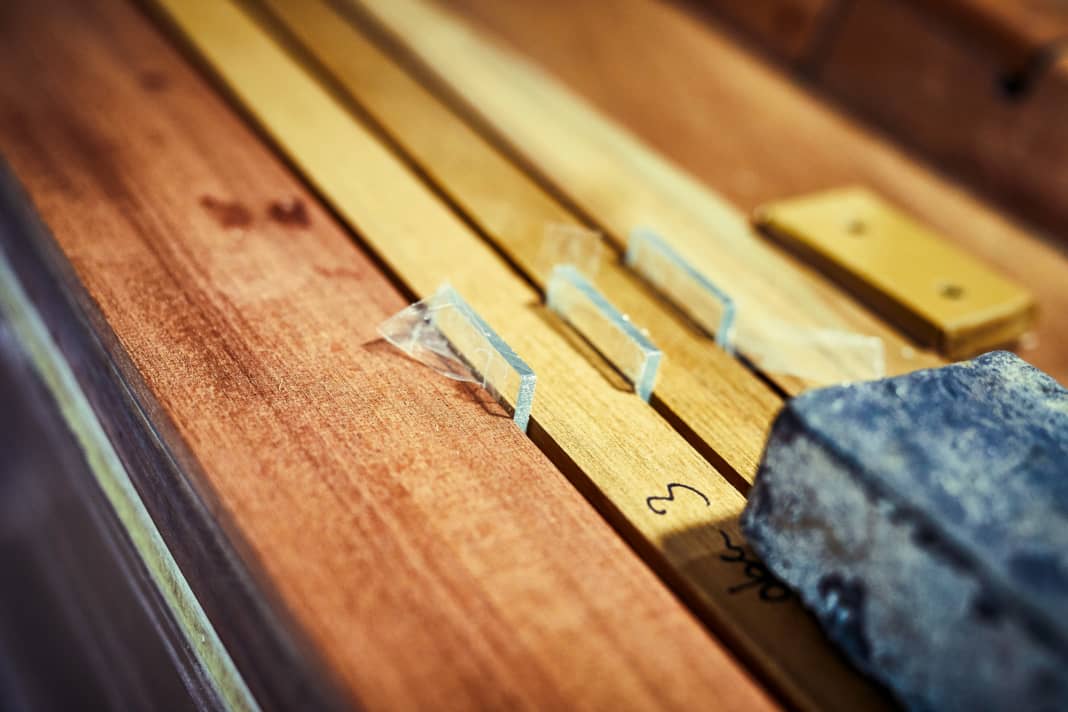
To do this, it is possible to drill a hole down to the plywood with a Forstner bit and determine the moisture content of the plywood with a wood moisture meter. If the plywood is dry and in good condition, the loose sticks can be glued back together with epoxy resin, unless you want to remove the entire deck. For this purpose, 5 mm diameter holes are drilled in the centre of each bar and unthickened epoxy resin is injected using appropriately sized needles. The newly bonded rods are weighted down with weights until the resin has hardened. The holes can then be sealed with an 8 mm plug glued in with epoxy resin.
Another way to determine the condition of the plywood under the deck bars is to look at the underside of the deck. Rotting of the plywood can often be detected by colour peeling and cracking in the direction of the fibres. If the plywood is soaked through or shows signs of rot, it can be partially replaced. However, a considerable part of the teak layer must be removed for this. If large areas are affected, there is no alternative but to replace the entire deck.
Joint repairs on decks
It can often be observed that joints between the deck staves protrude upwards due to wear and tear on the teak deck. This is not only a visual impairment, but the deck also offers less grip and there is a risk that the movement of the crew on deck will cause joint compound to be removed from the flanks.
If the joints themselves are still intact and adhere to the flanks, a Mozart precision knife can be used to cut the joints flush with the deck bars - a simple task that can be carried out by anyone.
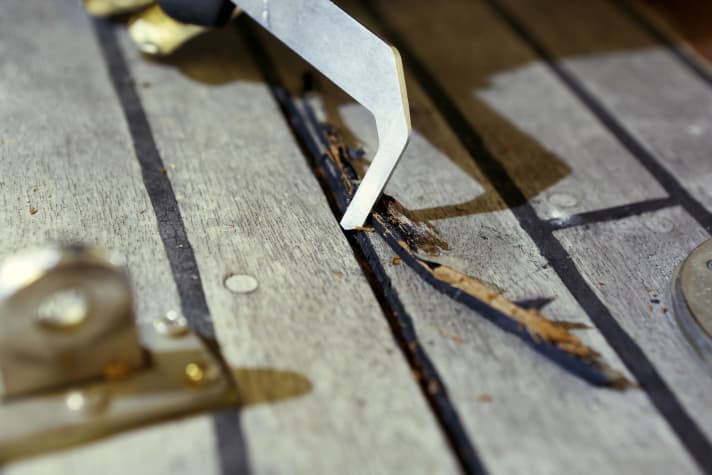
If the existing joint sealant is porous and leaking, clean joints must first be created on the deck planks so that they can be replaced. Furthermore, for visual reasons, the joints should not have any serious tears or serpentine lines. The aim should also be to achieve a seam width that is as continuous and uniform as possible.
Manual labour is required for the joints
The Fein-Multimaster with jointing claw or a lamellar groove milling machine are suitable for this tedious and very careful work. Routers are not recommended as they are difficult to "keep on track".

Achieving clean joints is a tedious task despite the use of mechanical aids, but manual labour is indispensable. Homemade tools such as a bent file, which is ground into a joint scraper, or sandpaper wrapped around a strip of sheet metal are often efficient helpers.
In the course of a deck refurbishment, it is often essential to remove fittings that have been sitting on the deck for a long time and appear almost "grown on". It is not uncommon for the wood under the fittings to already show signs of rotting or at least discolouration. Bungs can be placed here to prevent the rot from progressing.
Renewing joints without lubricating
Once the preparatory work has been completed, the joints can be filled. But how should the grout be applied to the joints without creating a "greasy disaster" or wasting too much material? If only small areas are to be grouted, a hand sprayer with a 310 ml cartridge is sufficient. If larger areas or an entire deck are involved, then 600-ml hoses, which can be used with a cordless gun, are advantageous both in terms of handling and price.
The choice of grout is not simplified by the oversupply on the market. (A detailed overview with advantages and disadvantages can be found in the book).
Care of teak decks
While spruce or larch, for example, need to be protected from weathering with varnish or oil and can therefore become dangerously slippery when walked on, teak does not need to be protected with a coating due to its own oil content. When it comes to caring for teak decking, the rule is "less is more". If care is too intensive, the true quality of a teak deck is revealed by the choice of wood: The grain of a teak plank should only have "standing growth rings", resulting in an evenly striped appearance on the top surface. Planks with vertical growth rings with an inclination of up to 45° are referred to as "rifts". Horizontal annual rings result in a flowery appearance on the top side with widely spaced annual rings. If "scrubbing" is too intensive, even across the grain, the wide, soft annual rings are removed faster and deeper than the narrow, hard ones, gradually creating a wavy relief.
Oiling teak decks has not proved successful unless they are always re-oiled
UV radiation gives raw teak a beautiful, even, grey-silvery colour. However, micro-organisms, algae, mould and, in very unkempt cases, even moss attack the unprotected teak, often making the deck look unsightly. To prevent this, yacht owners often use toxic products such as algae removers for decking or swimming pools. These agents may be helpful in removing the impurities from the wood. However, they are of little benefit to the paintwork, lines and fittings - not to mention the water.
Effective care for teak decks
The extremely effective product Boracol 10 Y(acht) from lavTOX can be used without hesitation. Before applying this product, the deck should be cleaned using a special sponge available from specialised dealers. The liquid product is then applied when the deck is dry using a brush, roller or spray bottle.
After around four to six weeks, the black stains in the wood caused by rain and seawater are removed and the deck shines with an even silvery colour. Treatment with Boracol twice a year, in spring and autumn, is sufficient. Oiling teak decks has proven to be unfavourable. On the one hand, too much oil no longer guarantees the desired slip resistance, on the other hand, too little oil causes the individual areas of the deck to erode to varying degrees and the deck appears blotchy - unless it is repeatedly re-oiled.
Mahogany solid wood decks
Most classic dinghy cruisers or dinghies such as pirates and H-dinghies are equipped with solid wood decks. Light woods such as gabon (okoumé) or khaya mahogany are usually used for this. To protect the wood, these decks are given a high-gloss varnish, which gives them an elegant appearance but makes them very slippery.
The problem with these thin but wide deck timbers is often cracking in the direction of the grain. A lot can be saved here by skirting, subsequent stripping and repainting. Screwing with plugs also often causes problems, as the wood can crack here too or the plugs are forced out by corrosion of the underlying screws and fall out.
Nowadays, these decks are made from veneers, often glued using a vacuum process without screws. Some dinghy builders even incorporate a layer of carbon fibre to increase strength.
Text: Uwe Baykowski
Care and maintenance of classic yachts- the book

In his maintenance and repair manual, the author has compiled all the knowledge he has gathered over 50 years of working in wooden boat building. In addition to instructions on how to care for your boat properly, you will learn everything you need to know to recognise damage and carry out minor and major repairs, including complete restoration, yourself if necessary.
The book costs 39.90 euros and can be can be ordered here in the Delius Klasing shop!

