

Perfect sailing weather may tempt you onto the water straight away, but the more time and effort you invest in planning a trip in advance, the more relaxed sailing will be later on. For me, this planning often extends over several phases, which in practice cannot always be clearly distinguished from one another. Roughly speaking, navigational trip planning takes place on three temporal levels: at home in the run-up to the trip, on board before setting off and at sea.
Navigation series
- Episode 1: Terrestrial positioning
- Episode 2: From map heading to compass heading and dead reckoning
- Episode 3: Inclusion of wind and electricity
- Episode 4: GPS waypoint navigation - tips and tricks and common mistakes
- Episode 5: Routing - preparing the day's route before setting off
The first phase of navigation begins weeks before the start of the trip. I start by looking around for useful information and documents about the area. This can be information from the Internet or from magazine articles - for example, travel and area reports, cruise and stage suggestions and the like. I also research suitable nautical documents for safe navigation.
This phase therefore spans a very wide range, from more touristic aspects with a view to an appealing route design to tangible seamanship considerations.
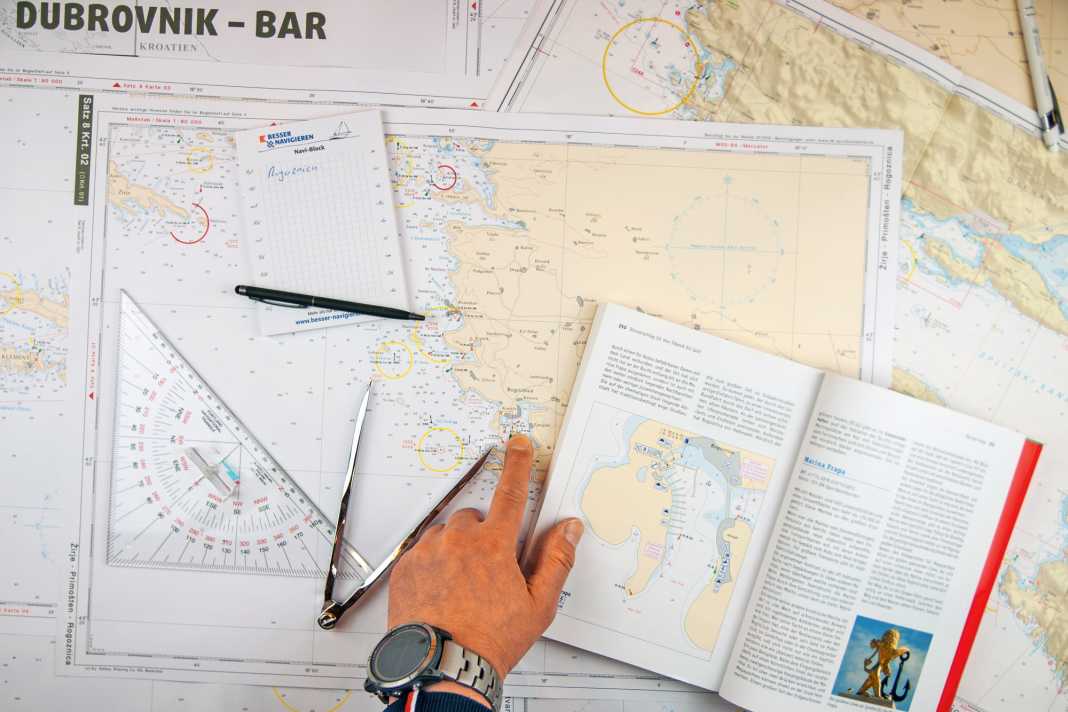
Navigation with your finger over the chart
With a view to safe navigation, the selection of suitable nautical charts as well as area guides and harbour manuals is one of the most important preparatory measures. I always buy these documents myself, even for charter trips. The manageable investment is offset by an immense benefit, as this is the only way to ensure reliable planning. What's more, on charter trips you never know the status and condition of the navigation documents on board. I simply regard them as part of the obligatory personal equipment that I wouldn't set off without - like sailing shoes and a hat, they have to come with me.
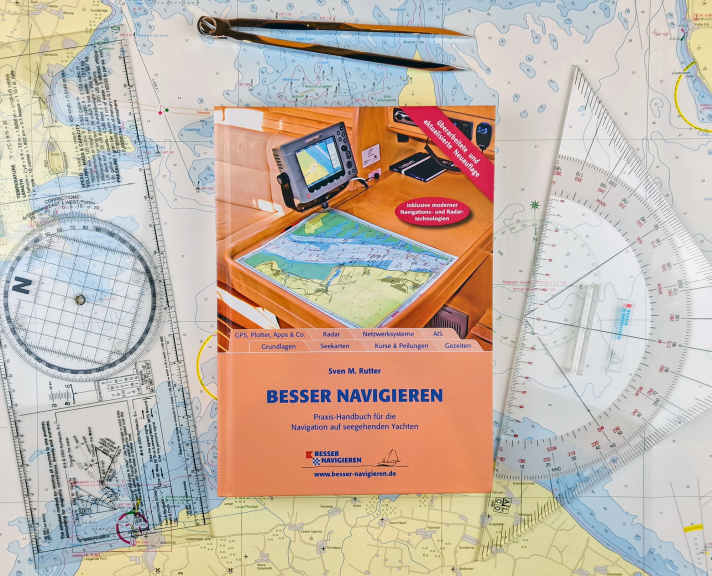
Reference book

The manual "Better navigation" by Sven M. Rutter covers the topics of classic navigation as well as the use of current navigation electronics.
- Further information: www.besser-navigieren.de
It also adds to the anticipation to sail over the nautical chart with your finger. The first orientation can be done on a small-scale planning chart. However, as soon as a specific area is being considered as a potential cruising area, larger-scale charts should be consulted. Complete recreational boating chart sets for a sailing area usually offer the best price-performance ratio with their harmonised compilation.
The same applies to the use of electronic nautical charts: initially, for example, you could use free online charts to get an initial overview. However, as soon as your plans become more concrete, it is better to purchase a fully-fledged chart set with all the available information.
Create a cheat sheet
Using the maps I have bought, I familiarise myself at home with all the peculiarities of the area: distances, depths, traffic routing, navigation restrictions due to restricted, protected and traffic separation areas, bridge or lock passages and so on. I make initial notes on possible stages and special navigational features.
In tidal areas, I also consult the most important tidal records during the preliminary planning. After all, the expected tidal currents determine the progress and thus the possible stage lengths (see episode 3), the tidal heights, the harbours that can be called at. I also make notes on this, for example: "section with considerable current speeds", "harbour only accessible for two hours at high tide" and similar.
Another important factor in navigation is the topography of the area, which in turn is indicated by the chart material. Cape and jet effects and often treacherous downdraughts can be expected on steep coasts.
Added to this is the expected swell, for example at shallow points, behind islands and so on. Such considerations also result in corresponding notes as part of the routing. These serve as a personal guideline for planning an optimal route. The more thought I give to this before the start of the trip, the better I can enjoy my sailing holiday later on.
Track down places of longing
At the same time, I scour the area guides I've bought for attractive harbours and anchorages. I look at the relevant harbour plans, get an initial idea of the approach, check the protection in different wind directions and find out about guest moorings and supply options. I never rely on one source alone. This is because sailing guides often focus on different aspects, so it is rare to find all aspects covered equally in one work.
As with nautical charts, up-to-dateness also plays an important role in navigation. Harbour plans in particular should be up to date so as not to cause any nasty surprises with regard to approaches and water depths.
At the same time, I find out about the necessary formalities, special traffic regulations and typical yachting customs in the area. What boat and crew documents are required on entry and in the harbours? How do they typically moor and tie up there? Do I need prior authorisation for certain destinations, for example in nature reserves, what are the requirements for obtaining it, and where can I apply for such documents?
A final check of the selected destinations is carried out via the Internet immediately before departure in order to be equally informed about short-term closures and the like.
A look at the statistics
Research in advance also includes the typical wind and weather conditions that can be expected in the area during the estimated sailing time. You will also find helpful information on this in good sailing guides. Regional wind and weather phenomena in particular should be mentioned there.
Information on the general weather conditions in the area can also be easily obtained via the internet. Statistical data on key weather parameters at individual locations can be called up on numerous weather websites such as Wetter-Online or Windfinder and also in popular weather apps such as Windy. This gives you an initial impression of the average wind conditions, the average temperature and the probability of storms and precipitation during the month of your trip.
There are also so-called pilot charts or monthly charts with "wind stars", which show the statistically most frequent wind directions and strengths in individual sea areas for each month. They are published by hydrographic institutes such as the Federal Maritime and Hydrographic Agency (BSH) and the British UKHO ("Admiralty Routeing Pilot Charts"). Some pleasure craft chart providers, such as NV-Verlag in Eckernförde, also have planning charts with wind stars in their programme.
Of course, statistical data doesn't always hit the mark. But at least they provide valuable clues as to what to expect. This in turn can be used to deduce which routes are likely to be unfavourable - because, for example, the wind is likely to be against you most of the time or the mooring you are aiming for is not sufficiently sheltered from the most common wind direction.
The grand plan
The result of this preliminary planning is a list that outlines a complete itinerary with all the stops over the entire duration. This list outlines the ideal itinerary, so to speak, and takes into account both the desired destinations and all the essential seamanship aspects on the basis of the information available.
The seamanship aspects also include a realistic assessment of personal capabilities and limits. What daily distances do I think myself and the crew are capable of? Should approaches in the dark and night sails be avoided as far as possible or are they generally not a problem? What weather conditions could be borderline for us?
The stage lengths should be set accordingly and a safety cushion for a late arrival in light winds and possible bad weather days should be planned. Here it helps to plan ahead (see episode 2). If these safety cushions are not needed, a spontaneous stop for a swim or even an additional day in the harbour can always be added.
However, in all my years of sailing, I have never managed to realise my ideal plan one-to-one. That's why I always include possible alternatives - a second and third best solution, so to speak. What would be the best alternative if we don't get a berth in the harbour we're aiming for? How can we adapt our planning if the weather puts a spanner in the works on one section of the route? Where can we find good shelter in the event of a storm?
The more extensive the list is and the more aspects it takes into account, the easier it will be to adapt to unexpected difficulties later on. Then you can simply resort to the proverbial plan B. What's more, you won't run the risk of running out of time so quickly if you regularly compare the actual course of the trip with your original plans. The ideal plan serves as a kind of roadmap in this respect.
Reality check for the planned navigation
As soon as we finally set off and I'm settled on board, the second phase begins. Although it starts a little earlier in terms of the weather. In the last few days before the start of the cruise, I keep a close eye on current weather developments in the area. In particular, I look at ground pressure maps to familiarise myself with the large-scale distribution of the weather-determining pressure structures (highs and lows), any frontal systems and their displacement: What is the current weather situation in the area and what further weather development can be expected?
This often leads me to make initial adjustments to my plans. This means that my original ideal route is sometimes a waste of time even before I cast off for the first time. But I have suitable alternatives up my sleeve.
On board, I finalise the roadmap immediately before the start of the trip. Then I can inspect the yacht in detail during a charter trip, know its capabilities and limits and have obtained the latest information on the weather and sailing area. All this gives me a final reality check, so to speak.
Stay flexible
The third planning phase extends over the entire course of the trip. Even if the trip is only one or two weeks long, not everything can be foreseen on the first day.
This applies in particular to the weather, which I monitor closely throughout the course of the trip. This includes continuous documentation of the weather on board in the logbook (air pressure, temperature, humidity, cloud cover, wind direction and strength). From this, I can deduce where in the large-scale weather pattern I am currently sailing, what to expect next and whether local effects are influencing the weather on site.
In addition to the weather, a variety of other circumstances such as technical problems, crew members with health problems or supply bottlenecks - for example, if fuel runs out due to a lack of wind - can disrupt the sailing plan en route.
Sometimes there are also positive things, for example when you decide to stay longer in a particularly beautiful place or to extend a wonderful sailing day a little longer. All of this requires continuous adjustments to the plan.
Every day anew
The day's route with its individual waypoints therefore basically represents daily planning, which is often only finalised in the morning before departure.
The latest information is also incorporated here: What wind conditions are forecast for today? What courses to the wind are on the planned leg? What speeds are we likely to achieve and what distance is realistic against this background? Only when this has been clarified do I finalise the day's destination and map out my route.
Finally, I check the day's planned route again for any hazards and other special features. A waypoint is set at every point where my attention is required en route - be it an upcoming course change or a potential hazard. This helps me to avoid overlooking critical points (see also the Tips for waypoint navigation in the previous episode).
I also familiarise myself with the details and registration formalities of the port of destination (online reservation options, VHF channel, location of guest berths, etc.) before setting off.
Relaxed sailing off
As a skipper, I always share my thoughts on route planning and navigation with my crew. After all, we are literally all in the same boat, and sometimes someone with an unbiased view may even have a better idea in individual cases. If you are new to an area, it can also be helpful to talk to your neighbours on the dock. I have often received valuable tips and advice for the next section of the route.
As long as nothing unforeseen happens, the mapped out route for the day is followed consistently, as I prefer to focus on sailing rather than navigational planning. And it gives me a good feeling that nothing more can really happen on the carefully planned route, at least from a navigational point of view.
Now you just have to be careful not to stray from the path unexpectedly. But if you take the tips in the previous episodes to heart, you should have no problem navigating.
Oracle in star shape

Wind stars in so-called pilot charts (monthly charts) indicate the statistical distribution of the prevailing wind directions and strengths in the reference period for their position on the chart - usually for a specific month of the year. The figures, which are somewhat reminiscent of ice flowers, usually have eight arms arranged around a circular centre and represent the main wind directions.
The arms symbolise wind arrows and, like real arrows, have small feathers or plumes at the end, the number and arrangement of which indicate the average wind force. There are also different ways of depicting the wind arrows, where they end in bars that indicate the statistical distribution of certain wind forces. If in doubt, a look at the legend will help. The length of the arms represents the frequency of the wind direction in question as a percentage. The number in the circular centre provides information on the frequency of calms (weakly circulating winds). This makes it possible to recognise at a glance from which direction and with what strength the wind blows most frequently in the corresponding month. Routeing charts for ocean passages also provide information about the typically prevailing surface currents.

