The contents of this special
- Part 1: Basics of the miracle resin
- Part 2: Which resin for which purpose?
- Part 3: Coating, coving, holes
- Part 4: Tubes, fillers, beams, fittings
Laminating, filling, gluing or priming - epoxy resin is suitable for almost any work on the boat and is often even the first choice. The material owes this versatility to its structure. The resin consists of a polymer with so-called epoxy groups. These highly reactive carbon-oxygen compounds cross-link with the hardener and produce an extremely stable, densely packed macromolecule that is virtually impossible to dissolve chemically.
Once cured, a thermoset is created, which means that thermal moulding is no longer possible. In contrast to polyester systems, epoxy polymers do not require any solvents to evaporate during curing. Depending on the resin system, solvents may be present to change the consistency, but these react during curing. Together with the compact molecular structure, this ensures the watertightness that is important in boatbuilding. Hydrolysis and the associated osmosis damage are ruled out if processed correctly. The absence of vapours also means that no respiratory protection or ventilation system is generally required during mixing and application.
Nevertheless, the material is not completely harmless. Above all, contact with the skin must be avoided, both with the resin and the hardener. Depending on the manufacturer and formulation, the hardener can also have a strong, pungent odour.
Epoxy resin has very good adhesive strength
Another advantage, however, is the very good adhesion to wood and almost all other materials, which is why practically all two-component primers are based on epoxy resin and almost everything can be bonded with epoxy. Difficulties only arise when bonding thermoplastics such as ABS and PVC, but there are also specially formulated resin systems for this.
If the plastic surface is additionally pre-treated and activated by scarfing, nothing stands in the way of a resilient bond.
The universal properties of the epoxy can be further optimised for the respective application. For example, as a low-viscosity laminating resin, which impregnates the reinforcing fabric particularly well and has a long processing time, or as specially matched resin-hardener combinations for vacuum infusion processes through to prepreg systems, which must be stored refrigerated until processing so that they do not harden prematurely. Another variant are viscous adhesive mixtures for joining the hull and deck and bonding highly stressed components such as bulkheads and entire floor assemblies into the boat.
Basics of epoxy processing 1
Mixing ratio for epoxy resin

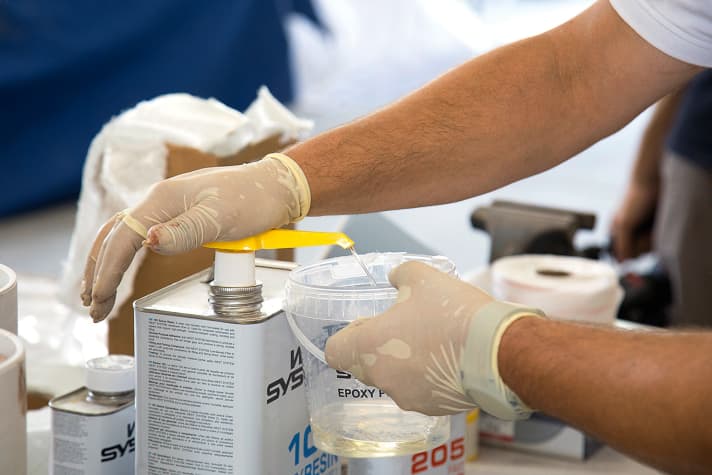
In contrast to polyester, where the hardener is actually a starter, the two components combine with each other in epoxy systems. The mixing ratio must therefore be adhered to exactly. Otherwise the material will not achieve the desired properties or will not cure at all. The easiest way to achieve the correct dosage is to use suitable pumps. Important: When using the pumps for the first time, prime them with small strokes until resistance can be felt. Only then should a full stroke be made. Tip: Always alternate between one stroke of resin and one stroke of hardener, then you won't get mixed up and only have to keep to the sequence. Alternatively, resin and hardener can be dosed using a scale or disposable syringes. Caution: The mixing ratios between volume and weight may vary depending on the manufacturer. Values between 5:1 and 10:1 are common, but there are also special cases such as five-minute epoxy with a 1:1 mixture.
Mixing epoxy resin

Stir slowly and evenly, also wiping the walls. Stirring quickly will only result in air bubbles. After stirring, decant again and do not use from the mixing cup. There may still be small residues of unmixed resin in the mixing cup, especially at the base edges. A brush is therefore also suitable for mixing, as it can reach these areas.
Pot life and processing time of epoxy resin

Curing starts as soon as the hardener is added. The pot life is decisive here. It describes how long the mixture can be processed and ranges from a few minutes to several hours, depending on the system. It is important to note that the time is not determined by the quantity of hardener, but by its properties. As a rule, the specification refers to a temperature of 25 degrees. This is good to know because, as a rule of thumb, the pot life doubles or halves for every ten degrees of temperature change. This must be taken into account when selecting the hardener. As heat is released during curing, the amount of resin also has an influence on the pot life. Large quantities should therefore be mixed in smaller batches and processed from a flat tray so that the heat of reaction is dissipated over a large area.
Continue in part 2
The videos of the series:
Part 1: Laminating, repairing, bonding or coating ... Many things are possible with epoxy resin. We therefore spent a few days at Von der Linden GmbH in the workshop and asked Helge von der Linden everything we ever wanted to know about this miracle resin. In the first part of our new series, we start with the basics and then Helge shows us how to coat wooden surfaces with epoxy resin. A complete free workshop for all owners!
Part 2: The second part of our epoxy guide series is about the frequently used ability of epoxy resin: laminating. Whether it's repairing holes in GRP or tightening loose bulkheads - after this video tutorial, anyone can draw fillets and laminate!
Part 3: The third part of our epoxy resin guide series on YACHT tv is all about fillers and repairing carbon fibre and soft GRP decks. With this knowledge, anyone can lend a hand, because working with epoxy resin is not rocket science. Expert Helge von der Linden shows the repairs step by step.
Part 4: After coating, repairing and laminating, the last part is about filling ... This type of repair is particularly necessary for minor damage to the GRP. Helge also shows us his favourite use of epoxy: gluing in fittings. We tested the forces up to which something like this really holds.

