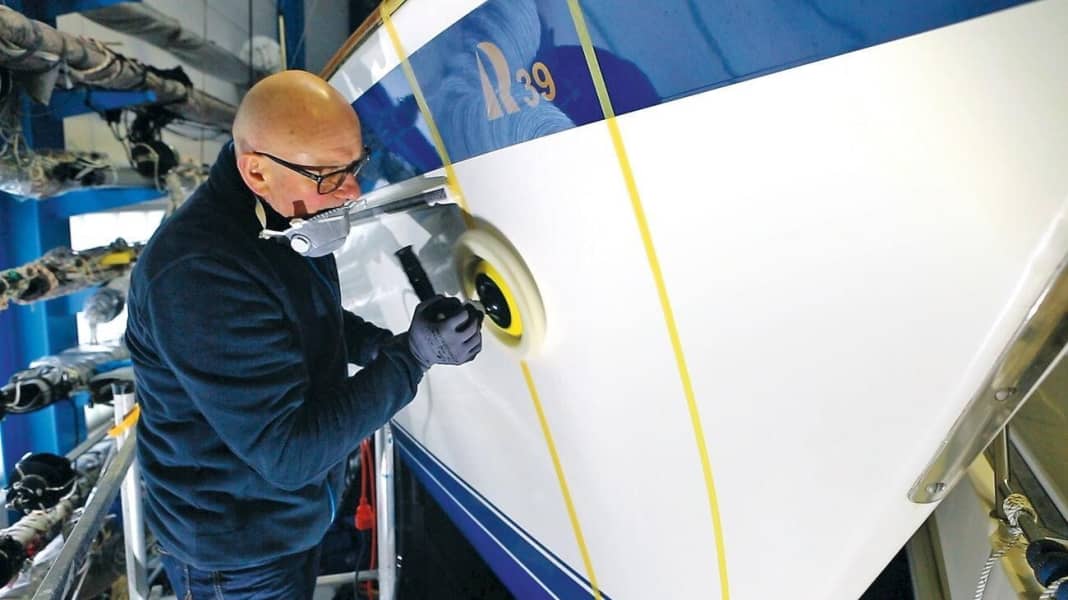
The fuselage should as clean as possible in winter storage, then dirt does not dry out and is easier to remove. First clean with warm water and soap, stubborn dirt can be removed with stronger cleaners such as Antigilb. You can also polish and apply a sealant in the autumn to give the sealant time to dry properly over the winter. In spring, if you are really committed, the sealant can be reapplied to increase its protective layer so that it lasts and protects for a season.
Theoretical principles of polishing
A little background on polishing: The biggest enemy of surfaces is UV radiation, which is responsible for the chalking of gelcoat and the weathering of paint layers. Together with dirt and fender abrasion, it eats tiny fragments out of the surface over the years. What remains is a micro-sized crater landscape - the gelcoat appears matt and rough. In addition, dirt can accumulate more easily and even the typical yellow Baltic beard develops more quickly, as the algae responsible for this thrive better in the pores than on a smooth surface.


To make such unsightly surfaces shine like new, they need to be treated. There are two types of polishes for this purpose: firstly, combination polishes, which only remove a small amount of the surface and contain waxes or other substances. This fills in pores and fine scratches and creates a glossy layer.
These products are very popular, they are easy to apply and quickly result in a visibly higher gloss and a better appearance. The disadvantage, however, is that the sealant usually does not last the entire season and you have to repeat the polishing process, which is hardly possible in the water, at least on the hull.
The alternative to this is professional polishes. As a rule, they do not contain waxes, but have a much stronger sanding performance and can actually smooth out most of the unevenness.
This makes the surfaces even and shiny again even before a sealant is applied. This work requires considerably more time and the right equipment. In addition, a final sealing is required, for example with a wax or polymer. The big advantage: the shine lasts for the entire season, and the amount of work required in subsequent years is also less, as the better-protected gelcoat does not age as quickly.
12 steps to a high-gloss hull
For almost new boats where the gelcoat is still very smooth, combination polishes may be sufficient. However, the profile solution, in which the abrasive and sealant are applied separately, also leads to longer-lasting protection here. Removal can be controlled by selecting a finer abrasive polish. This means you don't have to worry about polishing off too much substance unnecessarily.
The more weathered or rough a surface is, the more that needs to be removed. To ensure that this does not take too long, a paste with coarser abrasives is chosen. The crux of the matter is that there is a direct correlation between the grain size and the degree of gloss that can be achieved. In order to achieve the highest possible gloss level, it is therefore necessary to gradually switch from a coarse polishing agent to a finer one.
That sounds worse than it is in practice, because apart from exceptional cases, so-called one-step pastes are used today. These are products that start with a relatively coarse grit and deliver a high removal rate. During polishing, the abrasive is ground into smaller and smaller components, leaving an ever finer surface. The polish therefore covers a wide grit range and can be used from coarse to fine sanding. The gloss level is measured in values from 0 to 100 for non-metallic surfaces: Above 70, lacquers are referred to as high gloss.
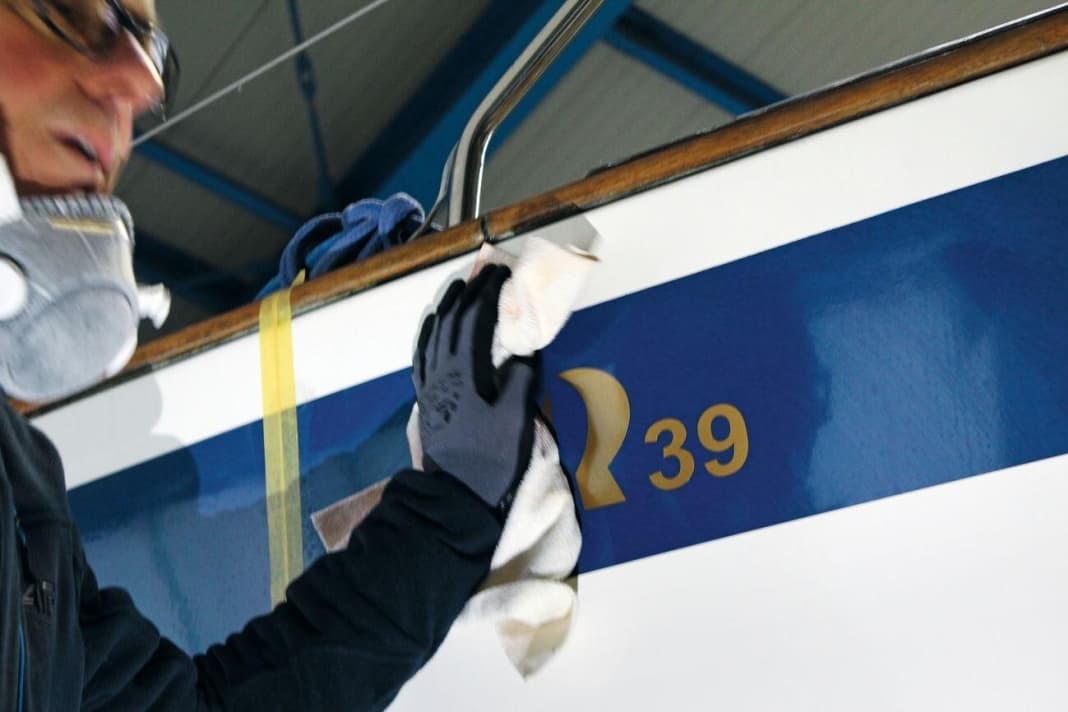


In the case of very heavy weathering, professionals work with special agents to remove some of the surface first. However, do-it-yourself polishers should be careful with such aggressive agents so that they do not remove too much of the gelcoat - and then, in the worst case, get onto the laminate.
However, the polishing agents are only half the battle - they also have to be used correctly. If you want to do this purely by hand, you will soon realise that the polishing process becomes an endless and exhausting undertaking. That's why it's better to use machines. There are machines with a rotating disc - these work like an angle grinder, but slower and with adjustable speed - and eccentric machines, where the holder works in a similar way to an orbital sander. Professionals usually prepare the surface with rotary tools as they are quick and effective. Disadvantage: You need to be very experienced in your movements. In order to polish every area evenly, the so-called cross stroke is necessary, whereby the work area is systematically travelled in overlapping paths. For the inexperienced, this can turn into hard labour.
Eccentric machines, which are also available as sets with a basic set of polishing sponges, are noticeably easier to use and therefore ideal for DIY enthusiasts. Some machines can even be moved over the surface with just one hand without having to follow a particular pattern. The only disadvantage is that the craftsman has to spend much more time on the polishing process than with the rotary machine. On the other hand, less effort is required and the necessary breaks are shorter. Incidentally, no matter which technique is used, machine polishing generates dust. Therefore, not only gloves, but also suitable respiratory protection should be a matter of course.
What professional polishing pastes and machines can do
Either sheepskin and lambskin discs or foam pads are placed on the discs of the rotary polisher. If you are experienced in using polishing agents, you can use wool pads or lambskin for the initial work steps, as they produce the most abrasion. However, they also produce the most heat and are particularly susceptible to so-called holograms, i.e. uneven sanding marks. Beginners should therefore use foam pads. These are also the first choice for eccentric devices.
The degree of hardness of the sponges can be used to control the polishing result. The hardest versions are almost like a wool pad; the softer the material, the lower the sanding performance and the higher the achievable gloss level. The colour indicates the respective degree of hardness, but be careful: every manufacturer assigns colour and hardness differently. To achieve the optimum polishing result, the coat or foam must be clean, so they should be changed every 20 minutes or so. Subsequent cleaning is best done gently in the washing machine; fabric softener is taboo. If the sponges are washed by hand, they should not be milled too vigorously, as this can easily loosen the felt layer for the Velcro on the machine disc. Once the hull has been polished to the desired gloss level, the surface must be cleaned again and then sealed. Waxes or polymer products are available for this purpose. We have tested polishing systems separately.
Can the deck be polished?
Non-slip surfaces on the deck are particularly problematic because dirt is difficult to remove from the moulded structure. There are special agents for non-slip surfaces such as "Non-Skid Deck Cleaner" from Star brite. Under no circumstances should a high-pressure cleaner be used for this, as this can damage the surface. So-called eraser sponges from the drugstore can also do a very good job on these problematic surfaces. Anti-slip areas should not be sealed, otherwise they can become slippery.
All smooth deck surfaces are polished in the same way as the hull. However, it can be more time-consuming here as there are many corners and small areas. It is often not possible to work with the large polishing machine and manual labour is required or it makes sense to invest in a smaller polishing disc. The discs can also be treated with the same polymer agents.
How much you save by polishing yourself
It's clear: refurbishing a weathered hull is a lot of work - but it pays off later. It would probably take a professional seven days to refit the hull and superstructure of a heavily weathered 40-foot yacht. A maintenance company would therefore easily charge 3,000 to 3,500 euros.
The positive thing about doing it yourself: The decisive factor is the labour hours. The consumables are hardly a factor, and even the basic equipment in the form of a high-quality eccentric polishing machine pays for itself in the second winter at the latest. And thorough preparation and sealing also saves labour in the long term. There's no getting round polishing again next season - but then all that's needed is a light touch-up with the finer paste and subsequent sealing.
To make polishing as comfortable and effortless as possible, a few little helpers are indispensable. An overview of useful polishing tools:
- Polishing machine
- Cleaning concentrate
- Lambskin discs
- Waffle sponges
- Polishing disc
- Protective wax
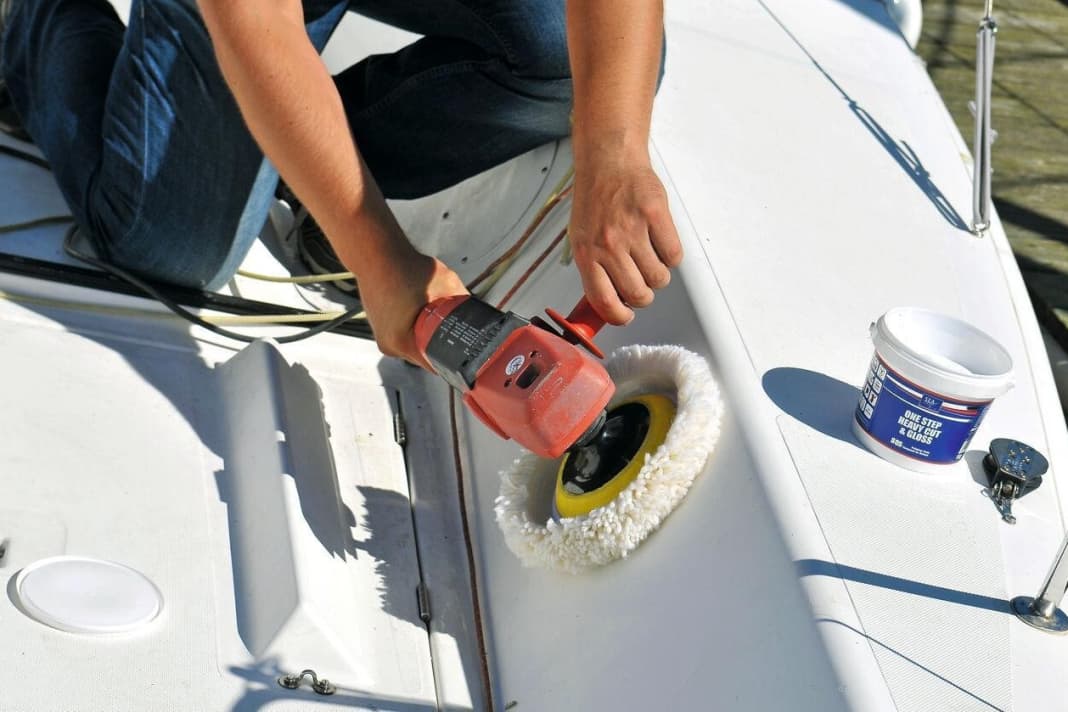


Regardless of the appliance, successful polishing is always a question of speed: when working with waffle sponges and distributing the abrasive, speeds of 600 to 800 revolutions per minute are required. For the sanding process, 1,200 to 1,500 revolutions are selected. It can also be a little higher for polishing. Eccentrics generally run about twice as fast.
4 professional tips for polishing
If problems arise during polishing, things have to be done quickly. It is also important not to ponder for long in the middle of the process, otherwise the paste will dry. How do you deal with unevenness on nameplates and what should you do to prevent the plate from catching paint on the antifouling of the underwater hull in the first place?
1. name trains
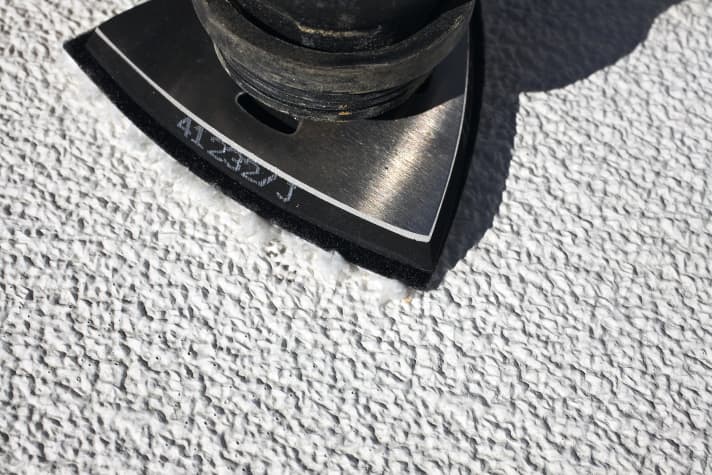
The extent to which the gelcoat weathers and erodes over the years can be seen in the old lettering. After the lettering has been removed, the letters are clearly raised. Such unevenness cannot be removed by polishing alone; in such cases, sanding is required. Start with 600 or 800 grit and gradually work your way up to 1,200 or 2,000 grit. Whether you proceed wet or dry depends on the material available. Wet work is generally easier for inexperienced users, as the sanding dust is removed better and the paper does not stick together as quickly. The supposedly gentler hand sanding method is not necessarily the better choice and is also tedious.
Sanding discs suitable for random orbital sanders can be obtained from your local car painter, for example, which has the advantage that you do not have to buy packs of 10 or 20 of each grit. Make sure that the sanding discs have a thin foam backing. Otherwise, additional intermediate discs are required, as the Velcro on the machine disc can press through with such fine grits and leave scratches. Once the letters have been levelled and the entire surface has been sanded evenly, the next step is polishing. If you have worked up to 2,000 grit, the finer abrasive paste is usually sufficient to achieve a high gloss.
2. coolant and lubricant
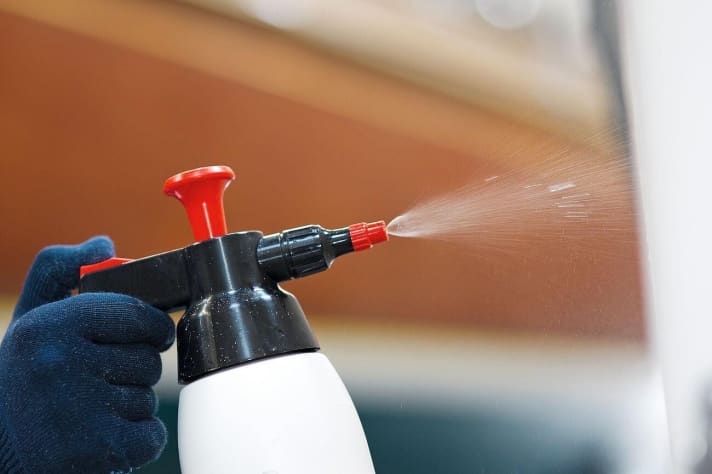
Temperature problems can occur, especially when working with rotary machines. The high removal rate generates frictional heat; the polishing paste becomes hot and dries out faster than intended. As a result, the machine bucks and the sponge sticks. A fine mist of water from the pressurised sprayer solves the problem. The additional moisture sprayed onto the hull or sponge cools and thins the paste.
3. splash guard
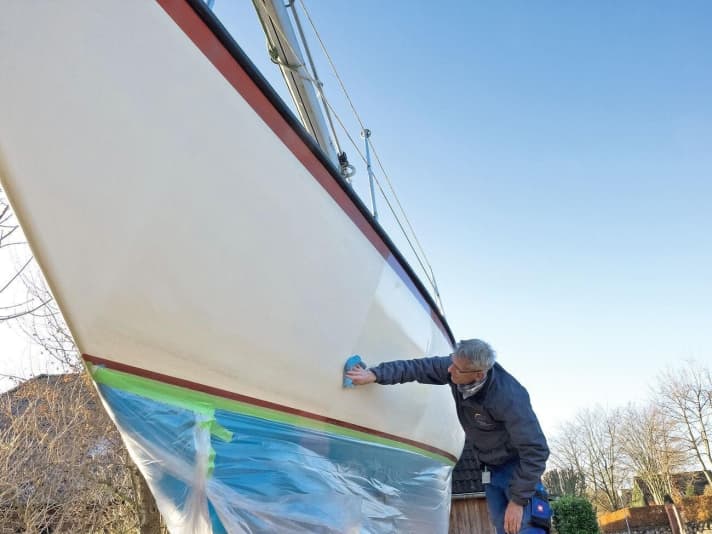
The underwater area and the deck should be covered or masked when polishing. Otherwise splashes may get onto the teak deck and leave stains. New antifouling does not adhere to polish or wax in the underwater area. If the antifouling is polished after application and wax gets onto the antifouling, it will not work optimally. A masking film with adhesive strips from the paint shop fulfils two tasks at once: It protects the underwater hull from polish and wax splashes and prevents the polishing disc from being soiled by the antifouling when working on the waterline. The thin film attracts static electricity to the hull. This means you can even drive over it with the machine without it coming off.
4. abrasion protection
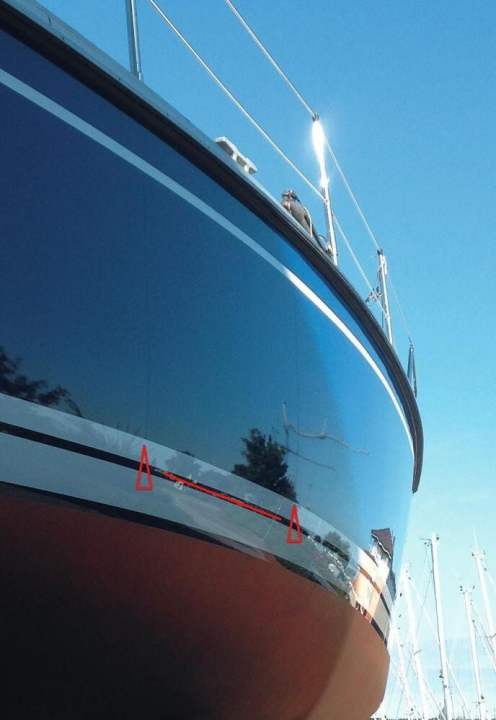
The side of the boat is exposed to the greatest stress in the area of the fenders. To protect the surface there from scratches, Peter Wrede offers a special film. The material, called Fender Protect, is wafer-thin, barely visible and is said to be extremely robust. It can be used on gelcoat and paint and can be removed without leaving any residue. A set of six films costs 595 euros including installation. You can obtain the slides here.
Polishing checklist
- Remove impurities
- Repairing damage
- Polishing
- Sealing
Download free of charge: Checklist for the start of the season PDF

